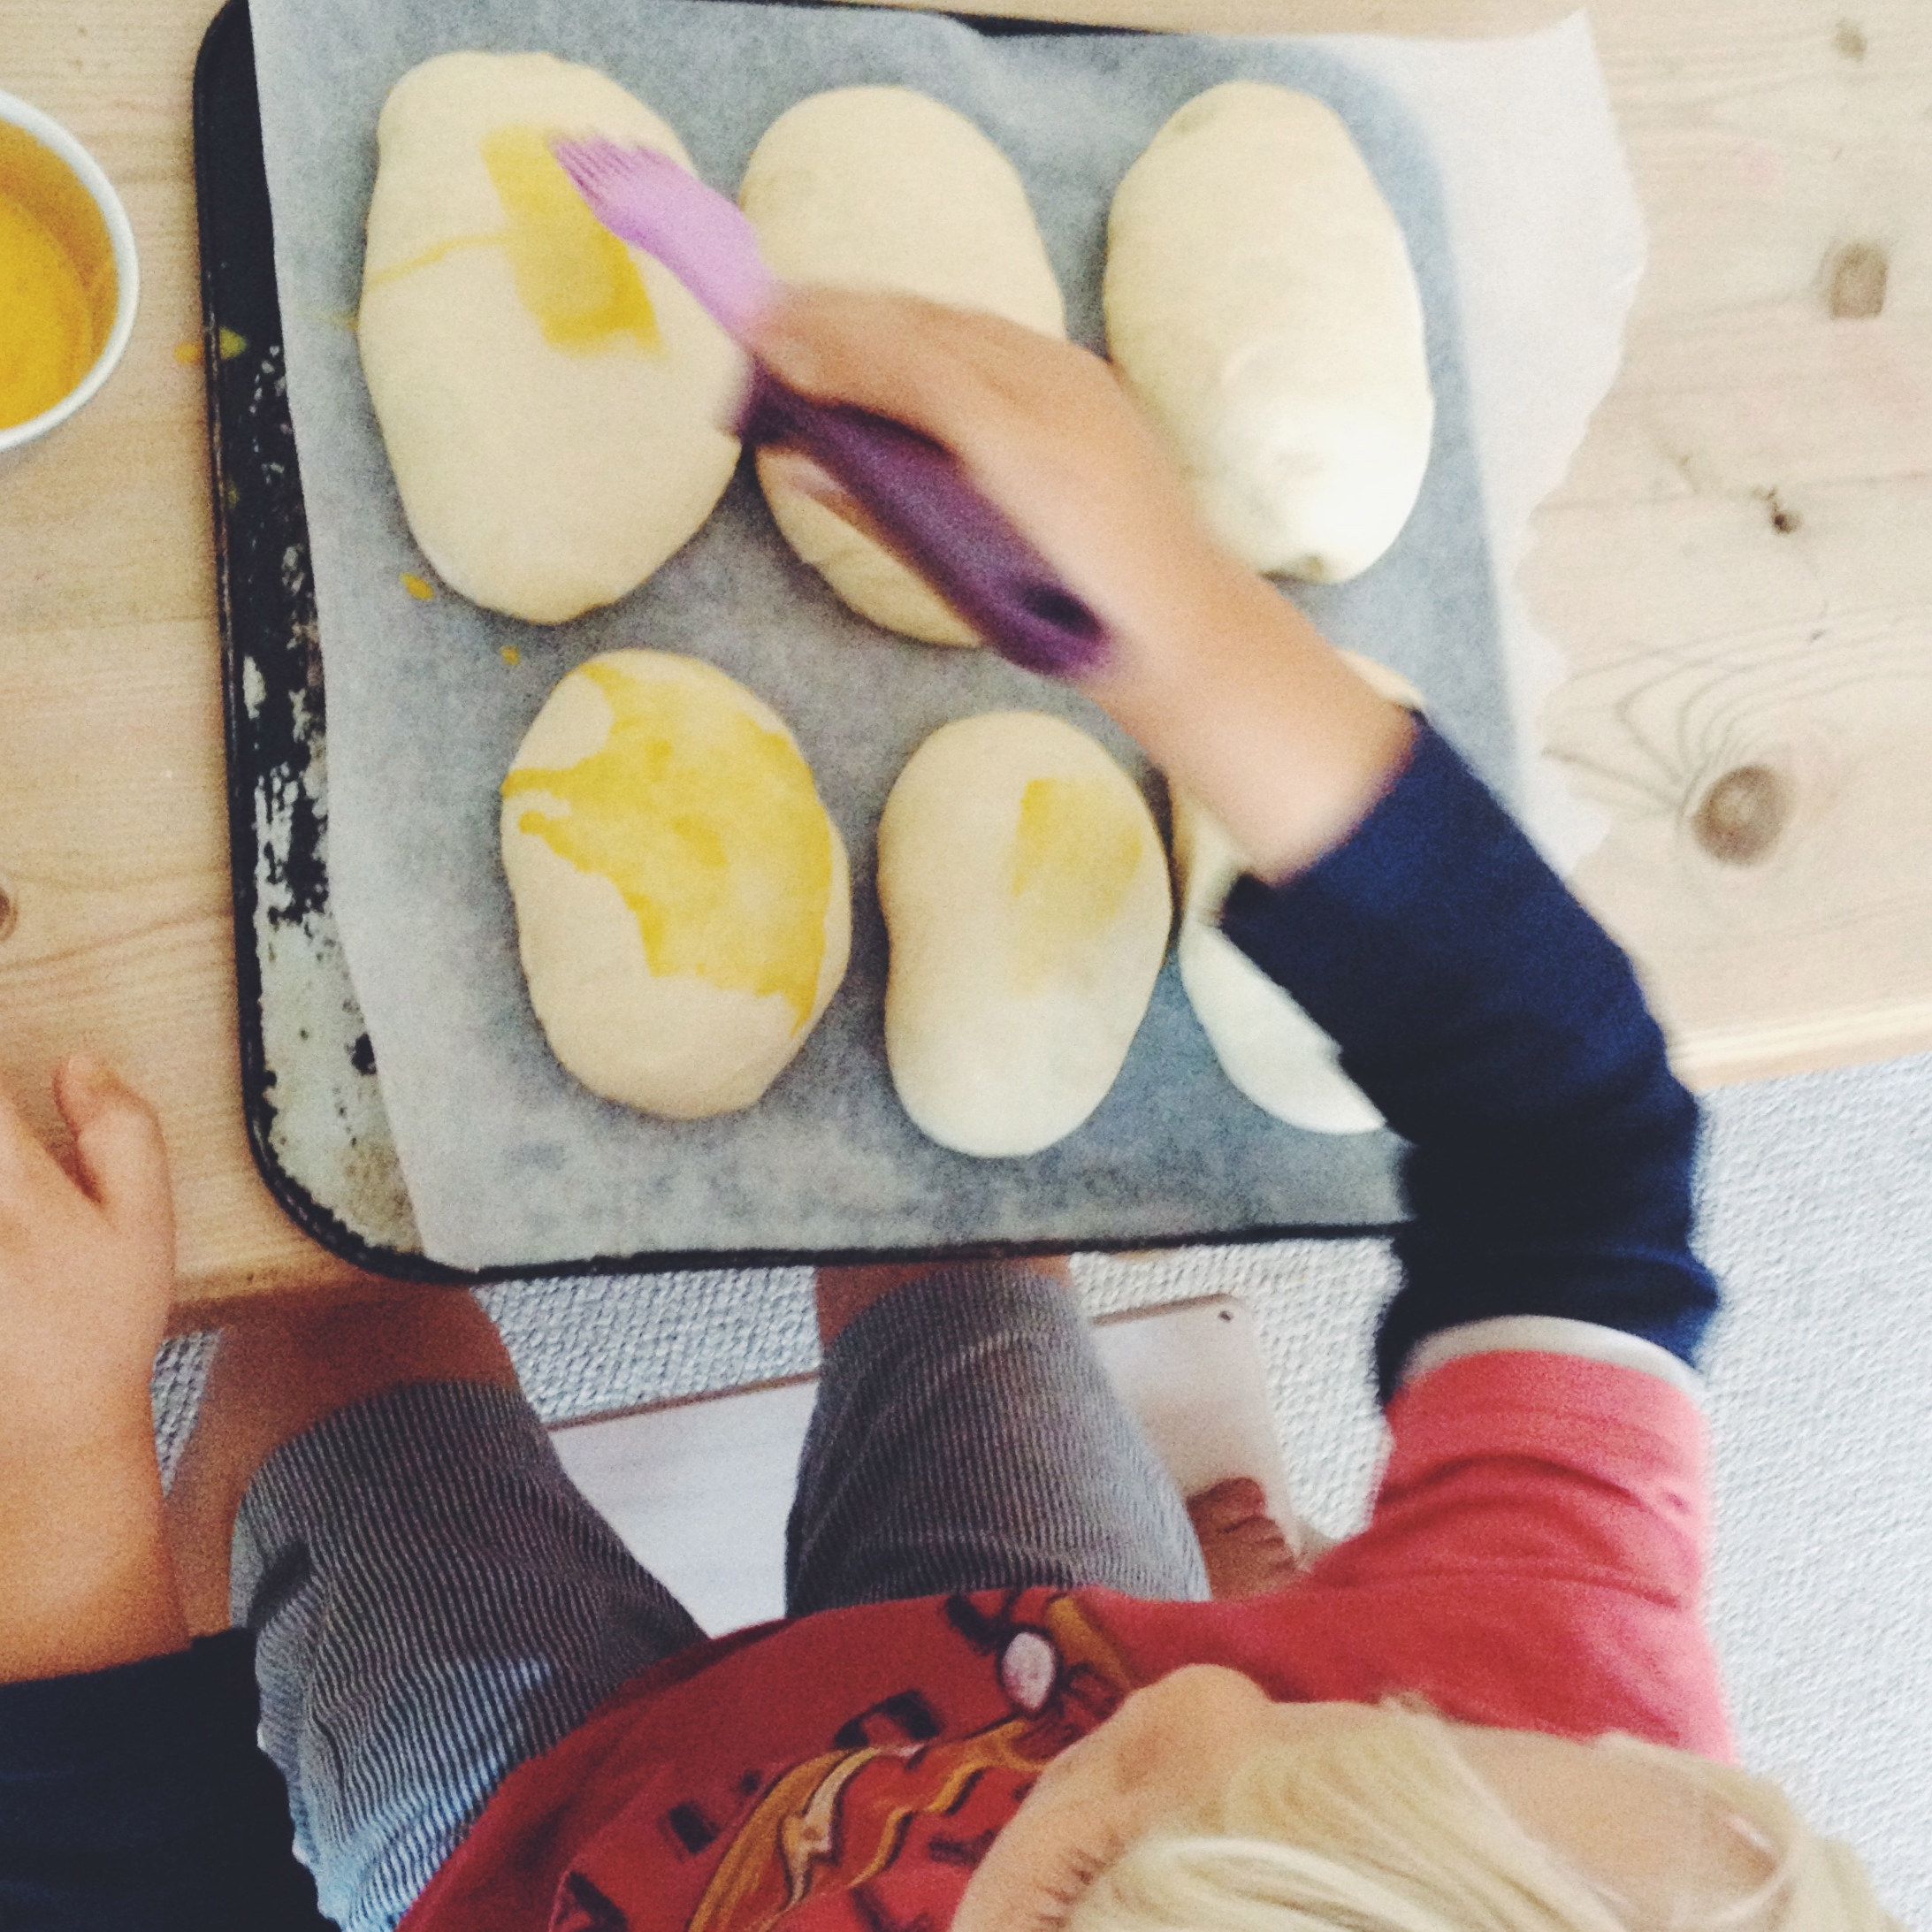
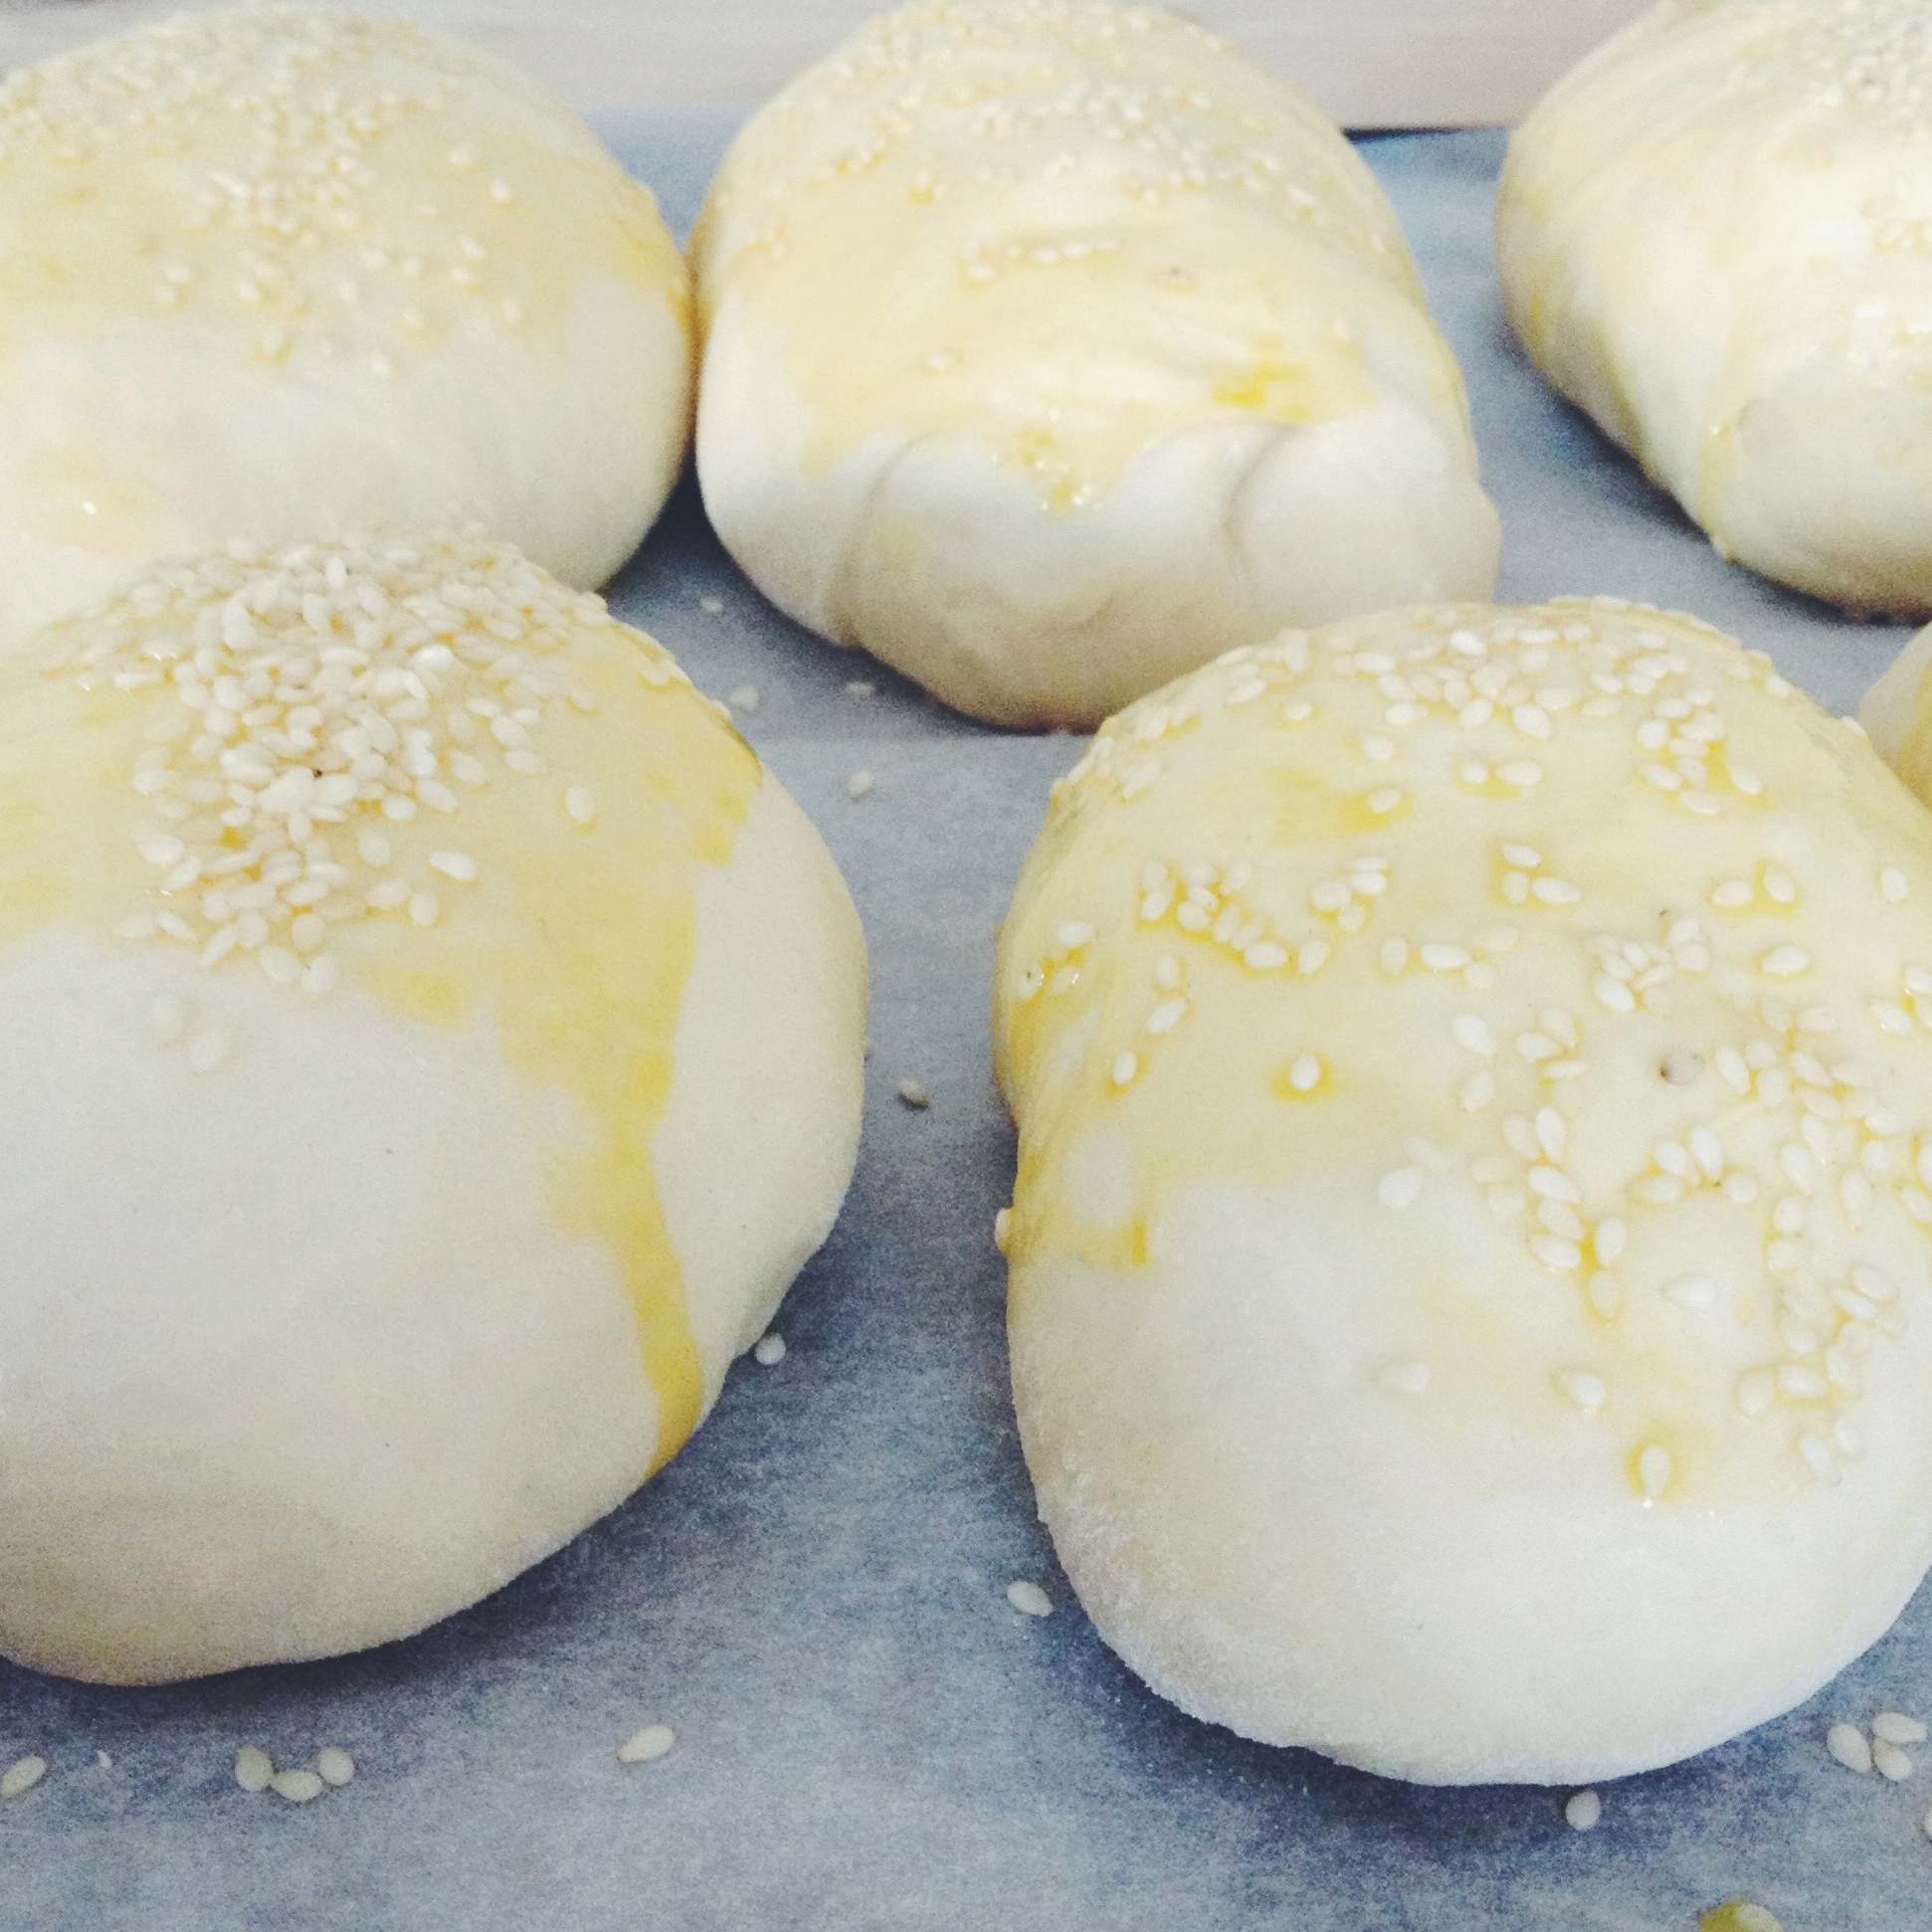
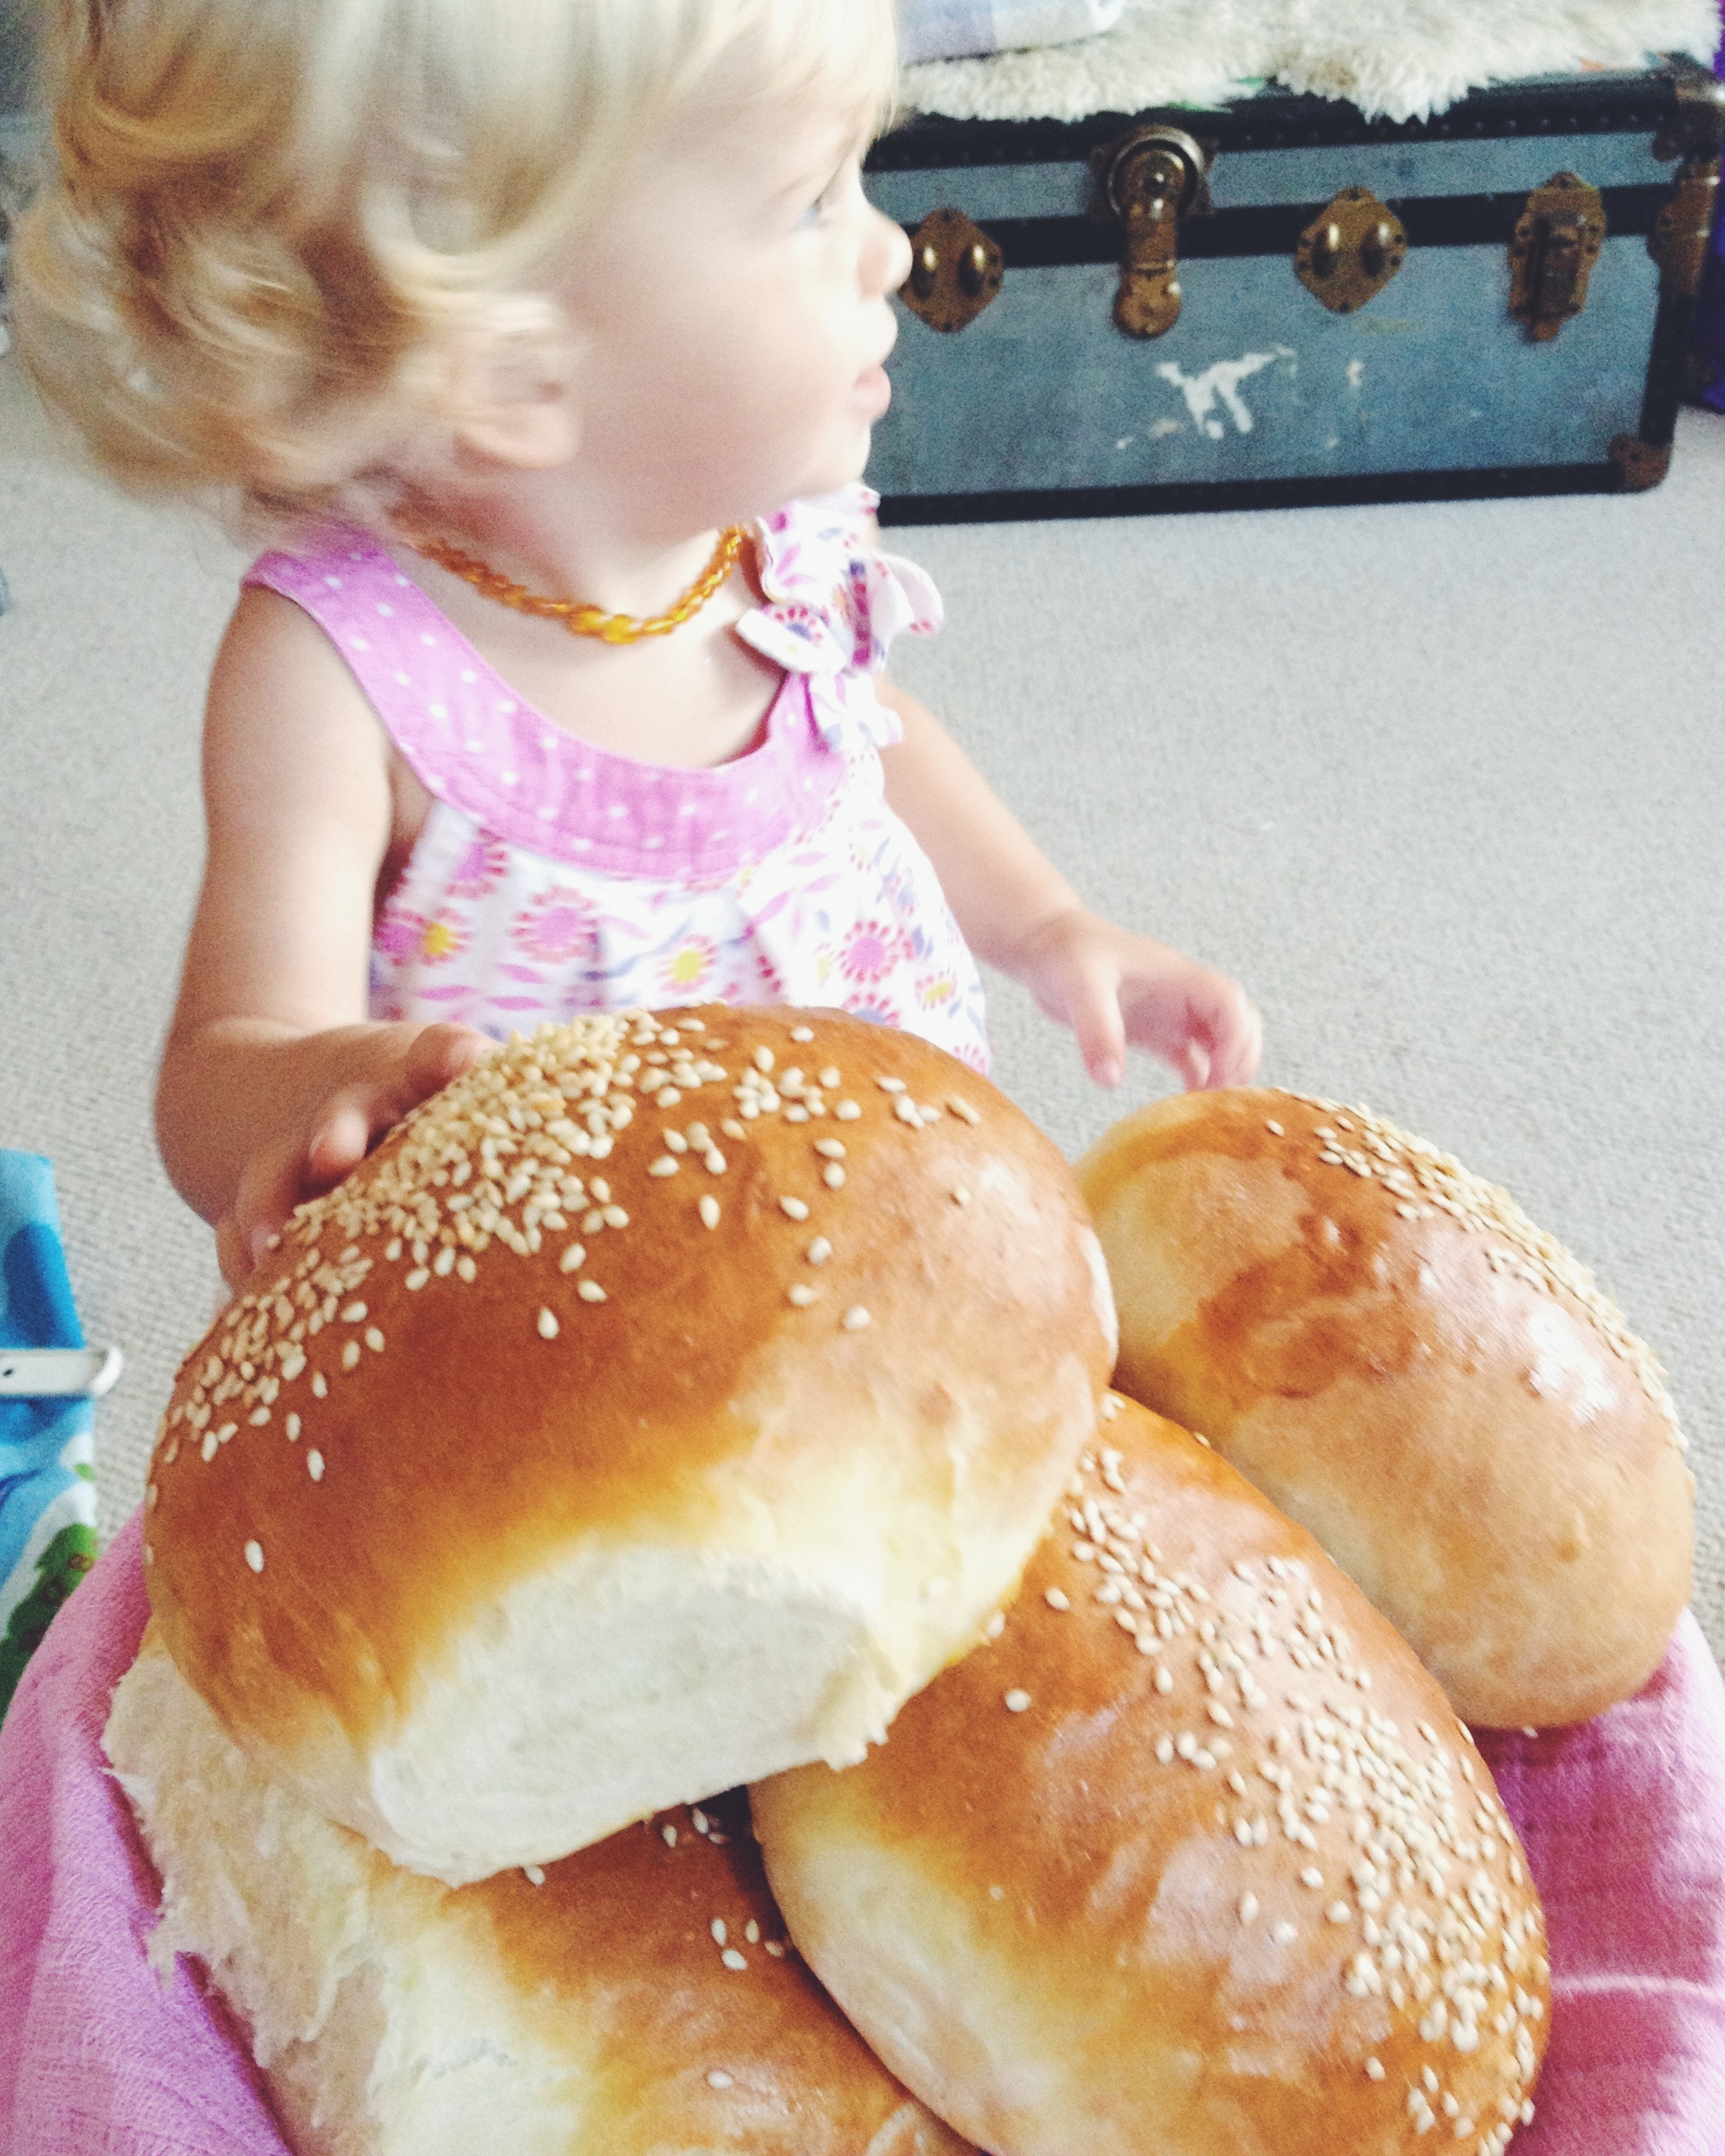
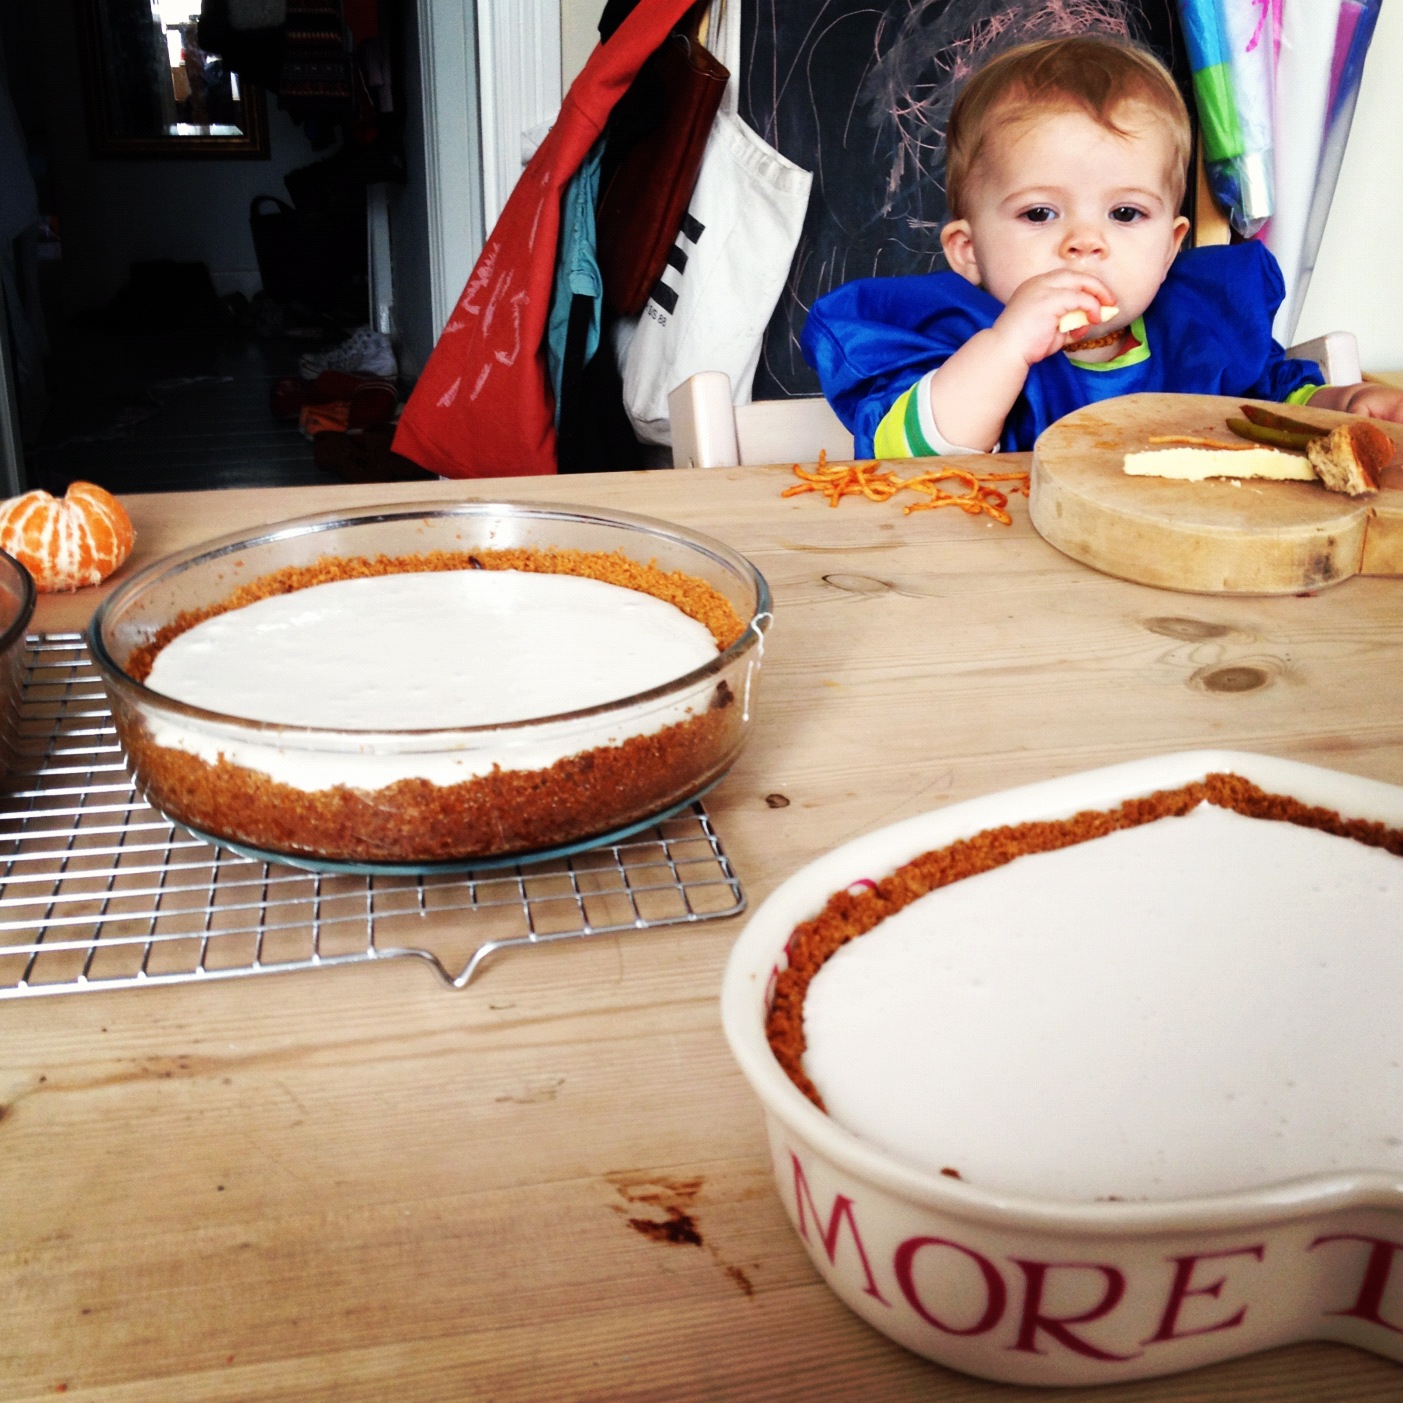
Goldenballs

And so, with back to school comes a return of the dreaded lunchbox. Another chore to add to the evening - or worse yet, morning - routine. In order to make the experience more of a challenge I tend towards obsessive health freakishness and insist on making life a thousand times more difficult by ensuring all snacks are home baked, no sugar allowed...and so on, until my head explodes. I so resent the overpriced, palm-oil filled, totally un-nutritious snacks so aggressively marketed to us mas, pas and kiddos, (and yes, this includes all the attractive organic carrot puffs and rice cakes) that I mostly refuse to buy them. The inevitable outcome is that I'm constantly caught short on the snack front, and there's only so many grapes, raisins and satsumas you can shovel down them. SO, on the off-chance I'm not alone in my predicament, I thought I'd have a stab at some easy, nutritious and lunchbox-friendly recipes. 

image-2.jpeg

Arancini

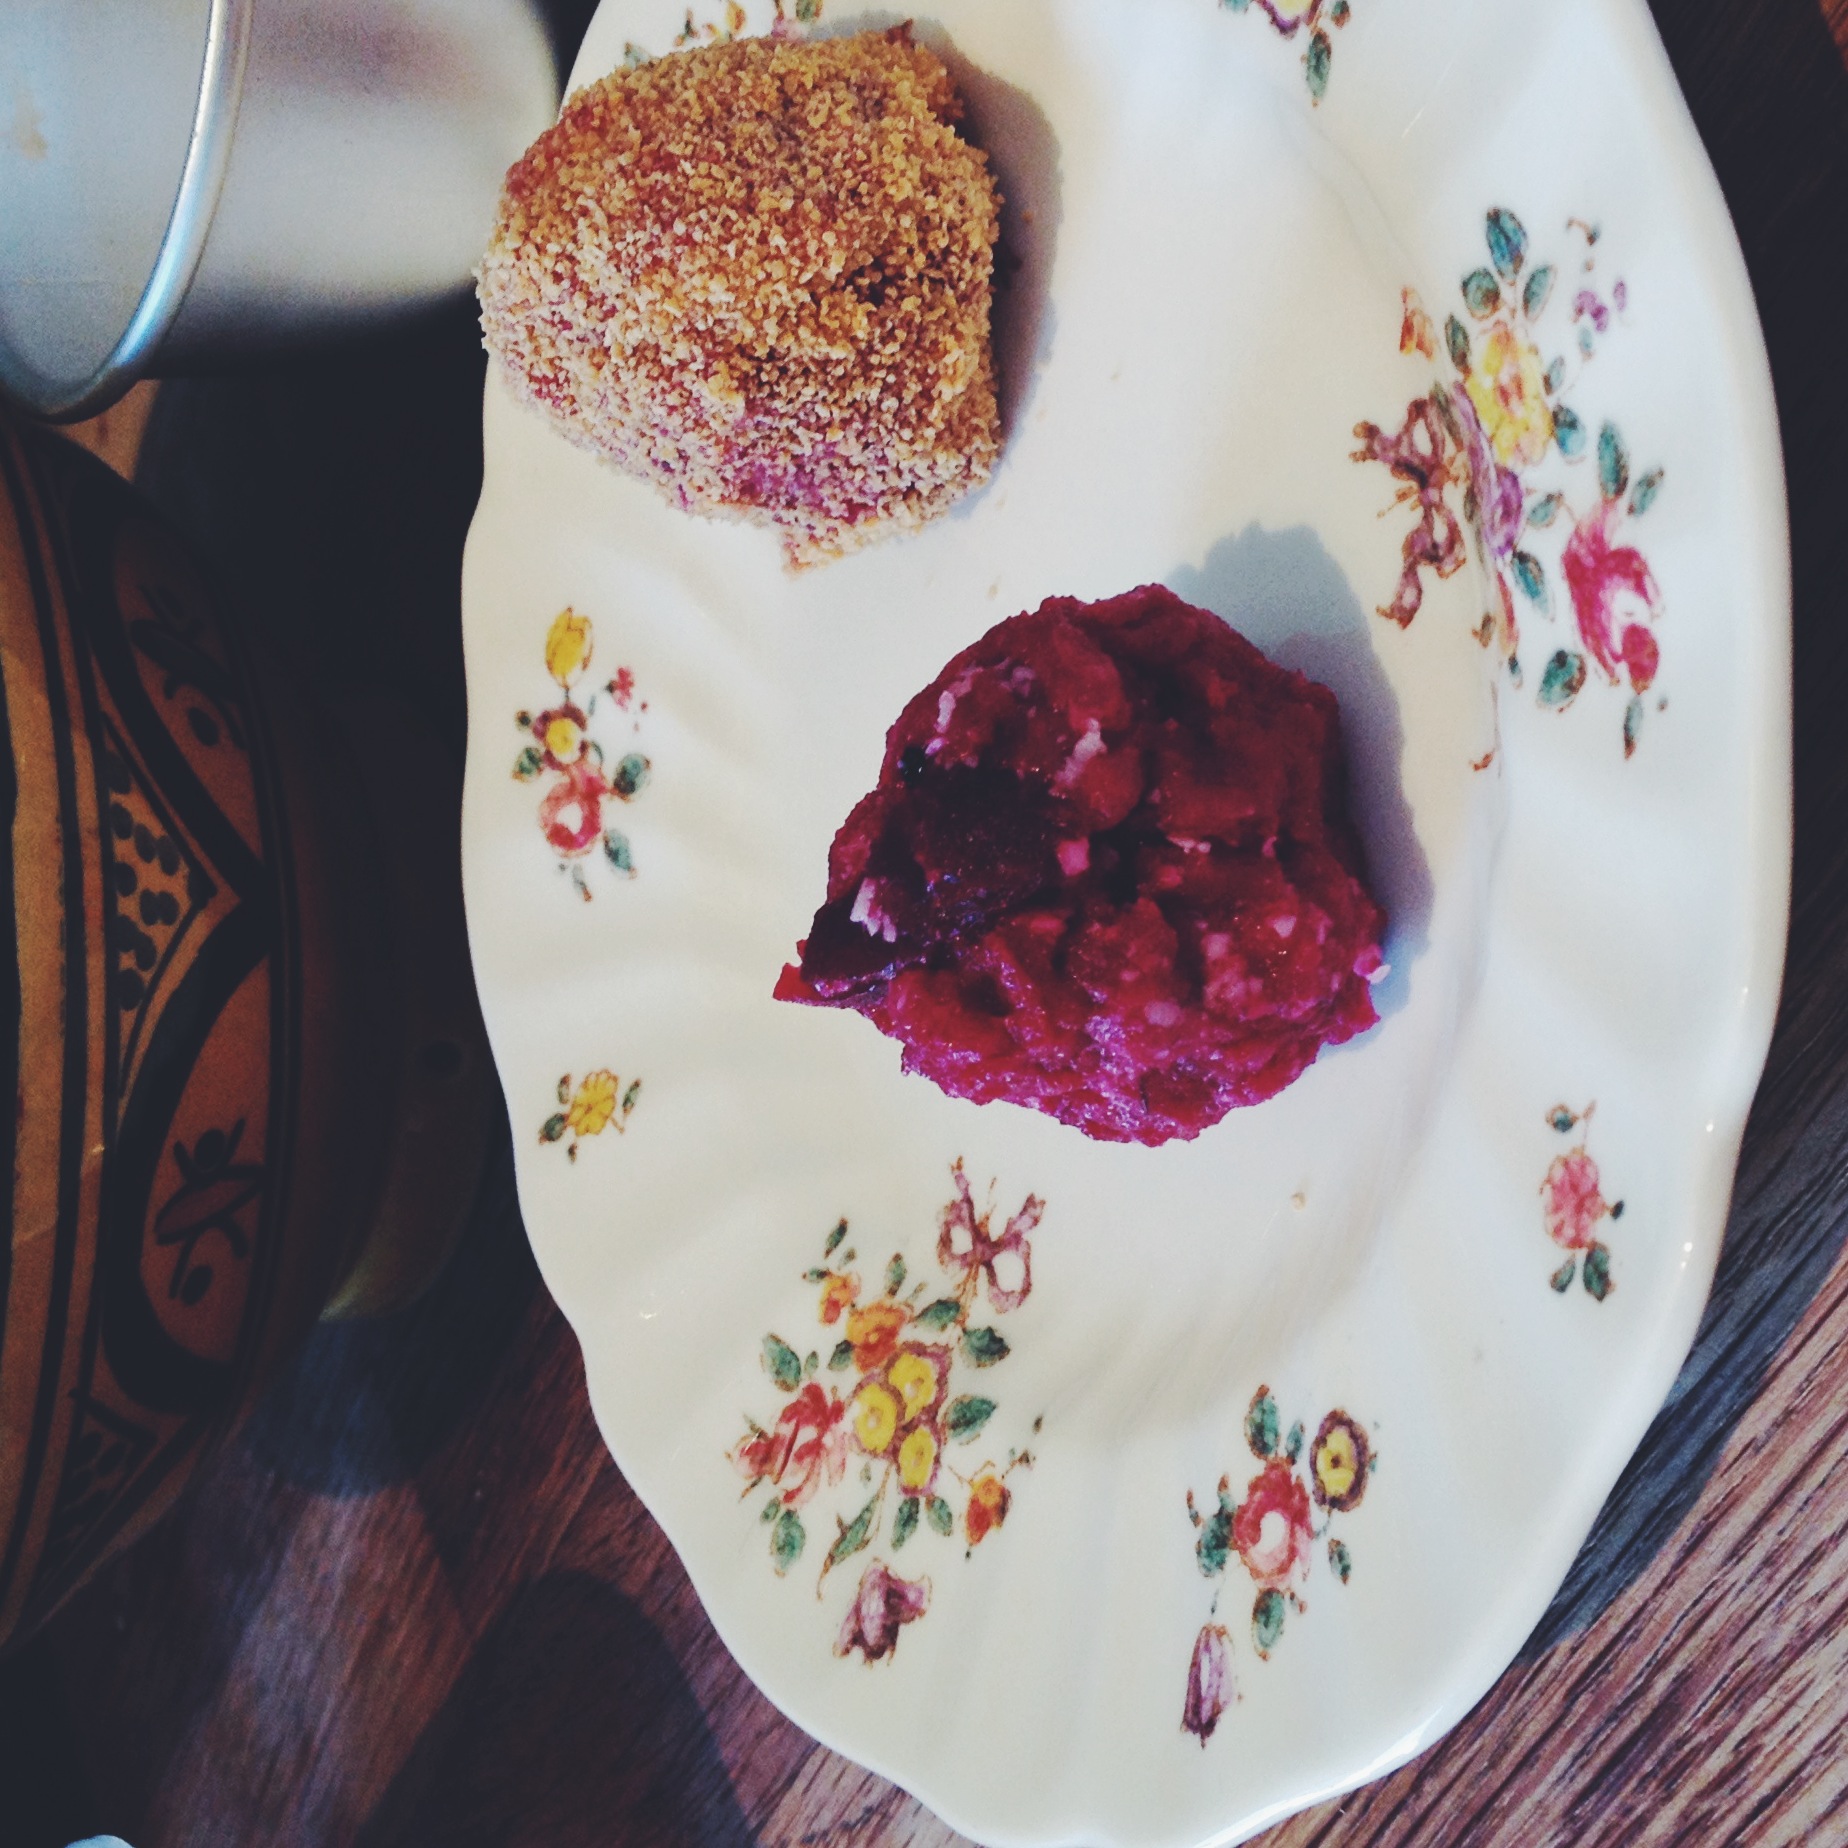
leftover risotto (of any flavour, though I used Beetroot - and the best beetroot risotto recipe in town is this one) 
an egg
breadcrumbs (you can buy these or stick some vaguely stale bread in the food processor)
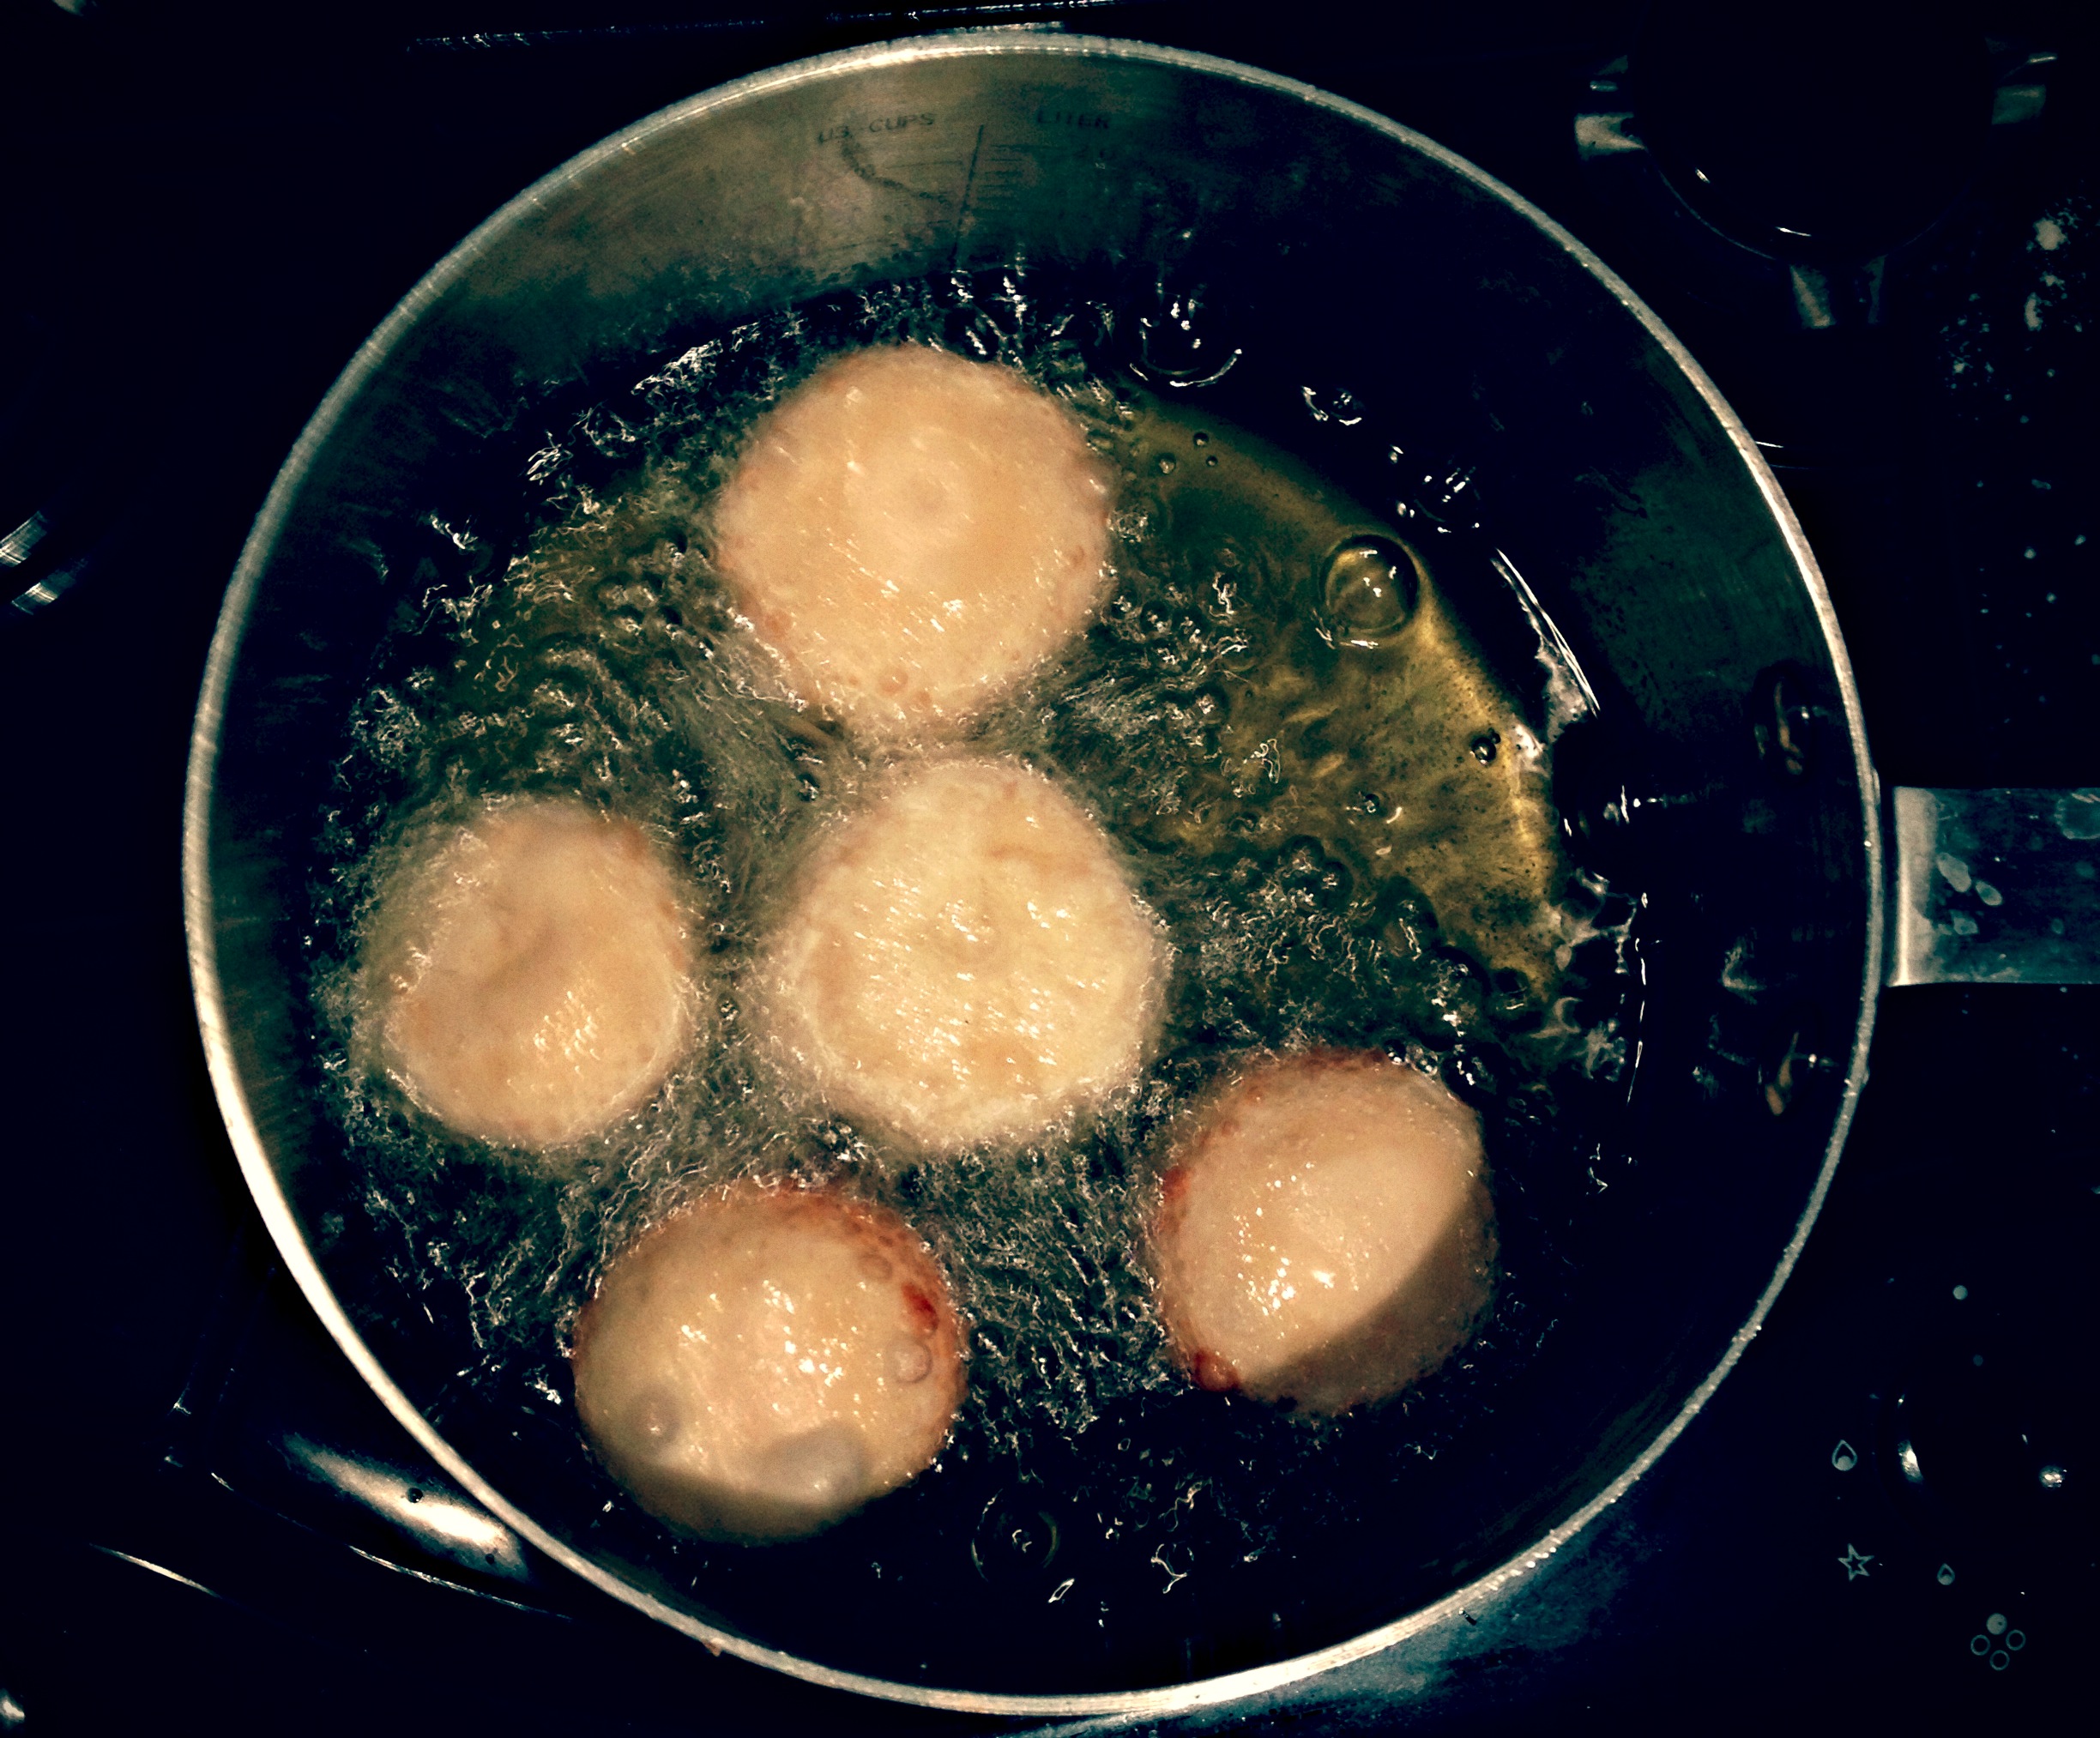
Rapeseed oil, 500ml - 1 litre


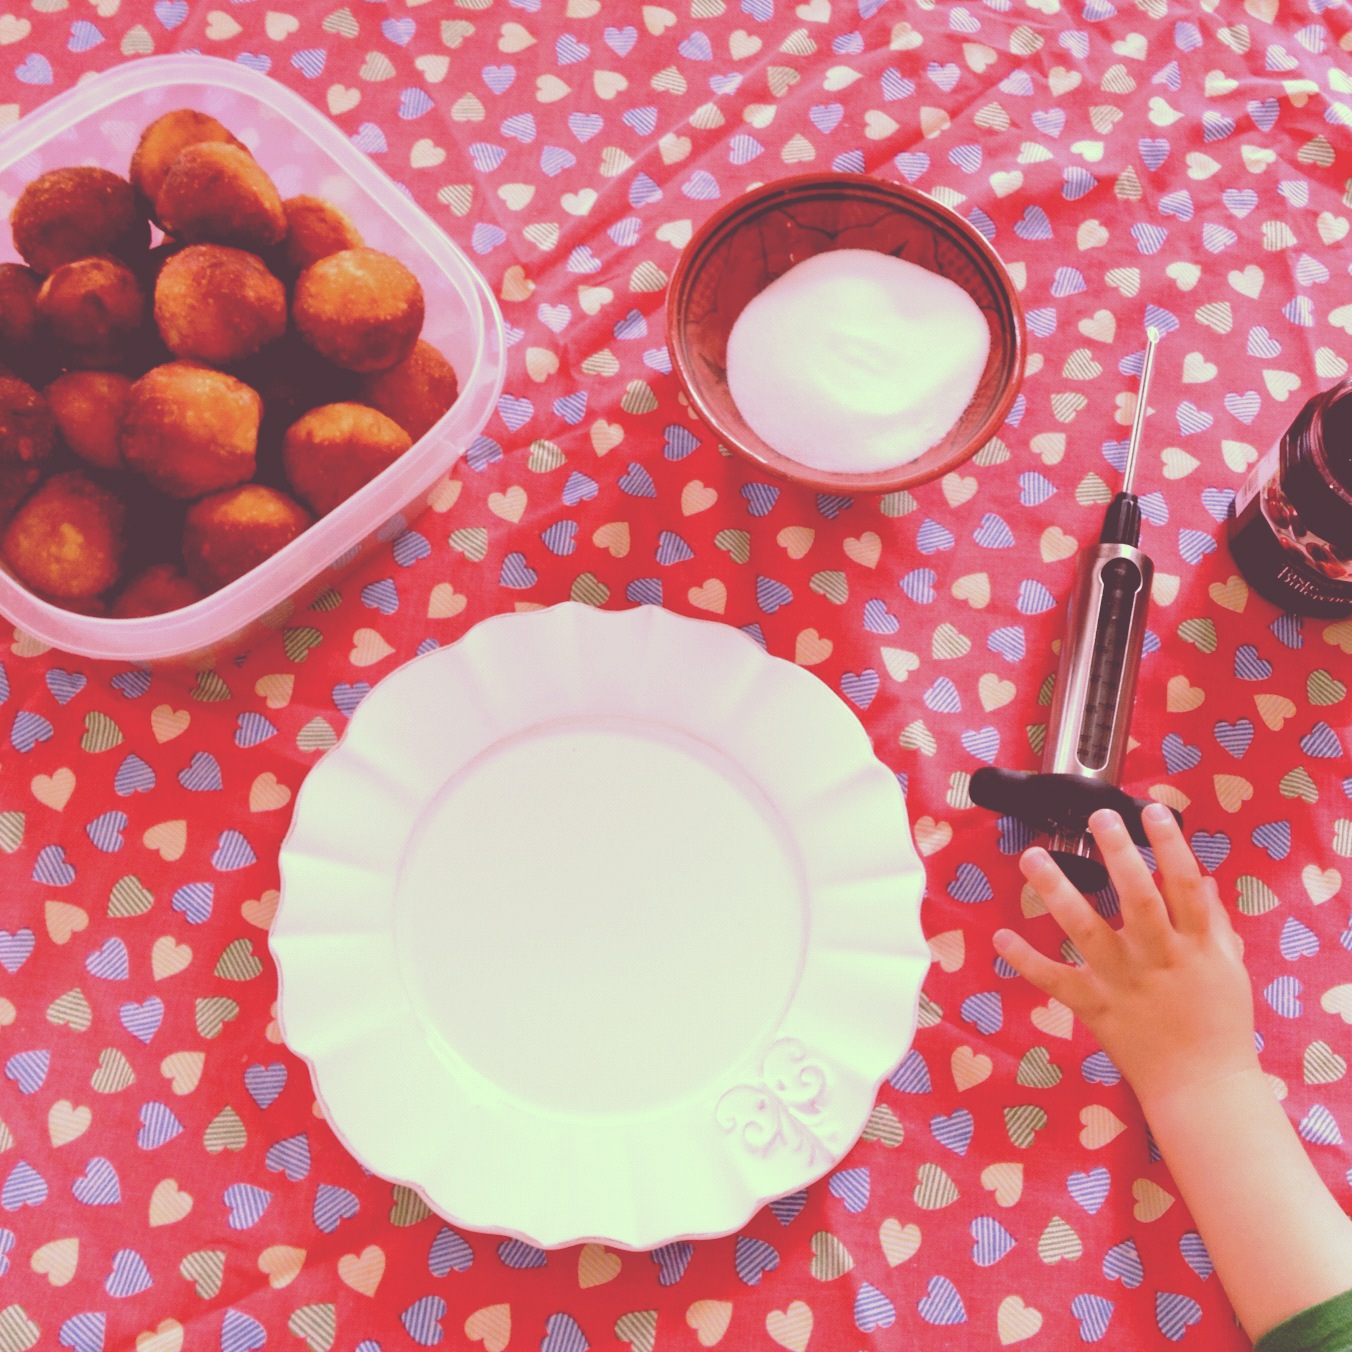
So you've made a delicious risotto, yippee! But if you're anything like me you have made a bit too much to be eaten at one sitting, but too little to feed the whole family another meal. We always end up with one small tupperware full, languishing in the fridge. Not any more... 

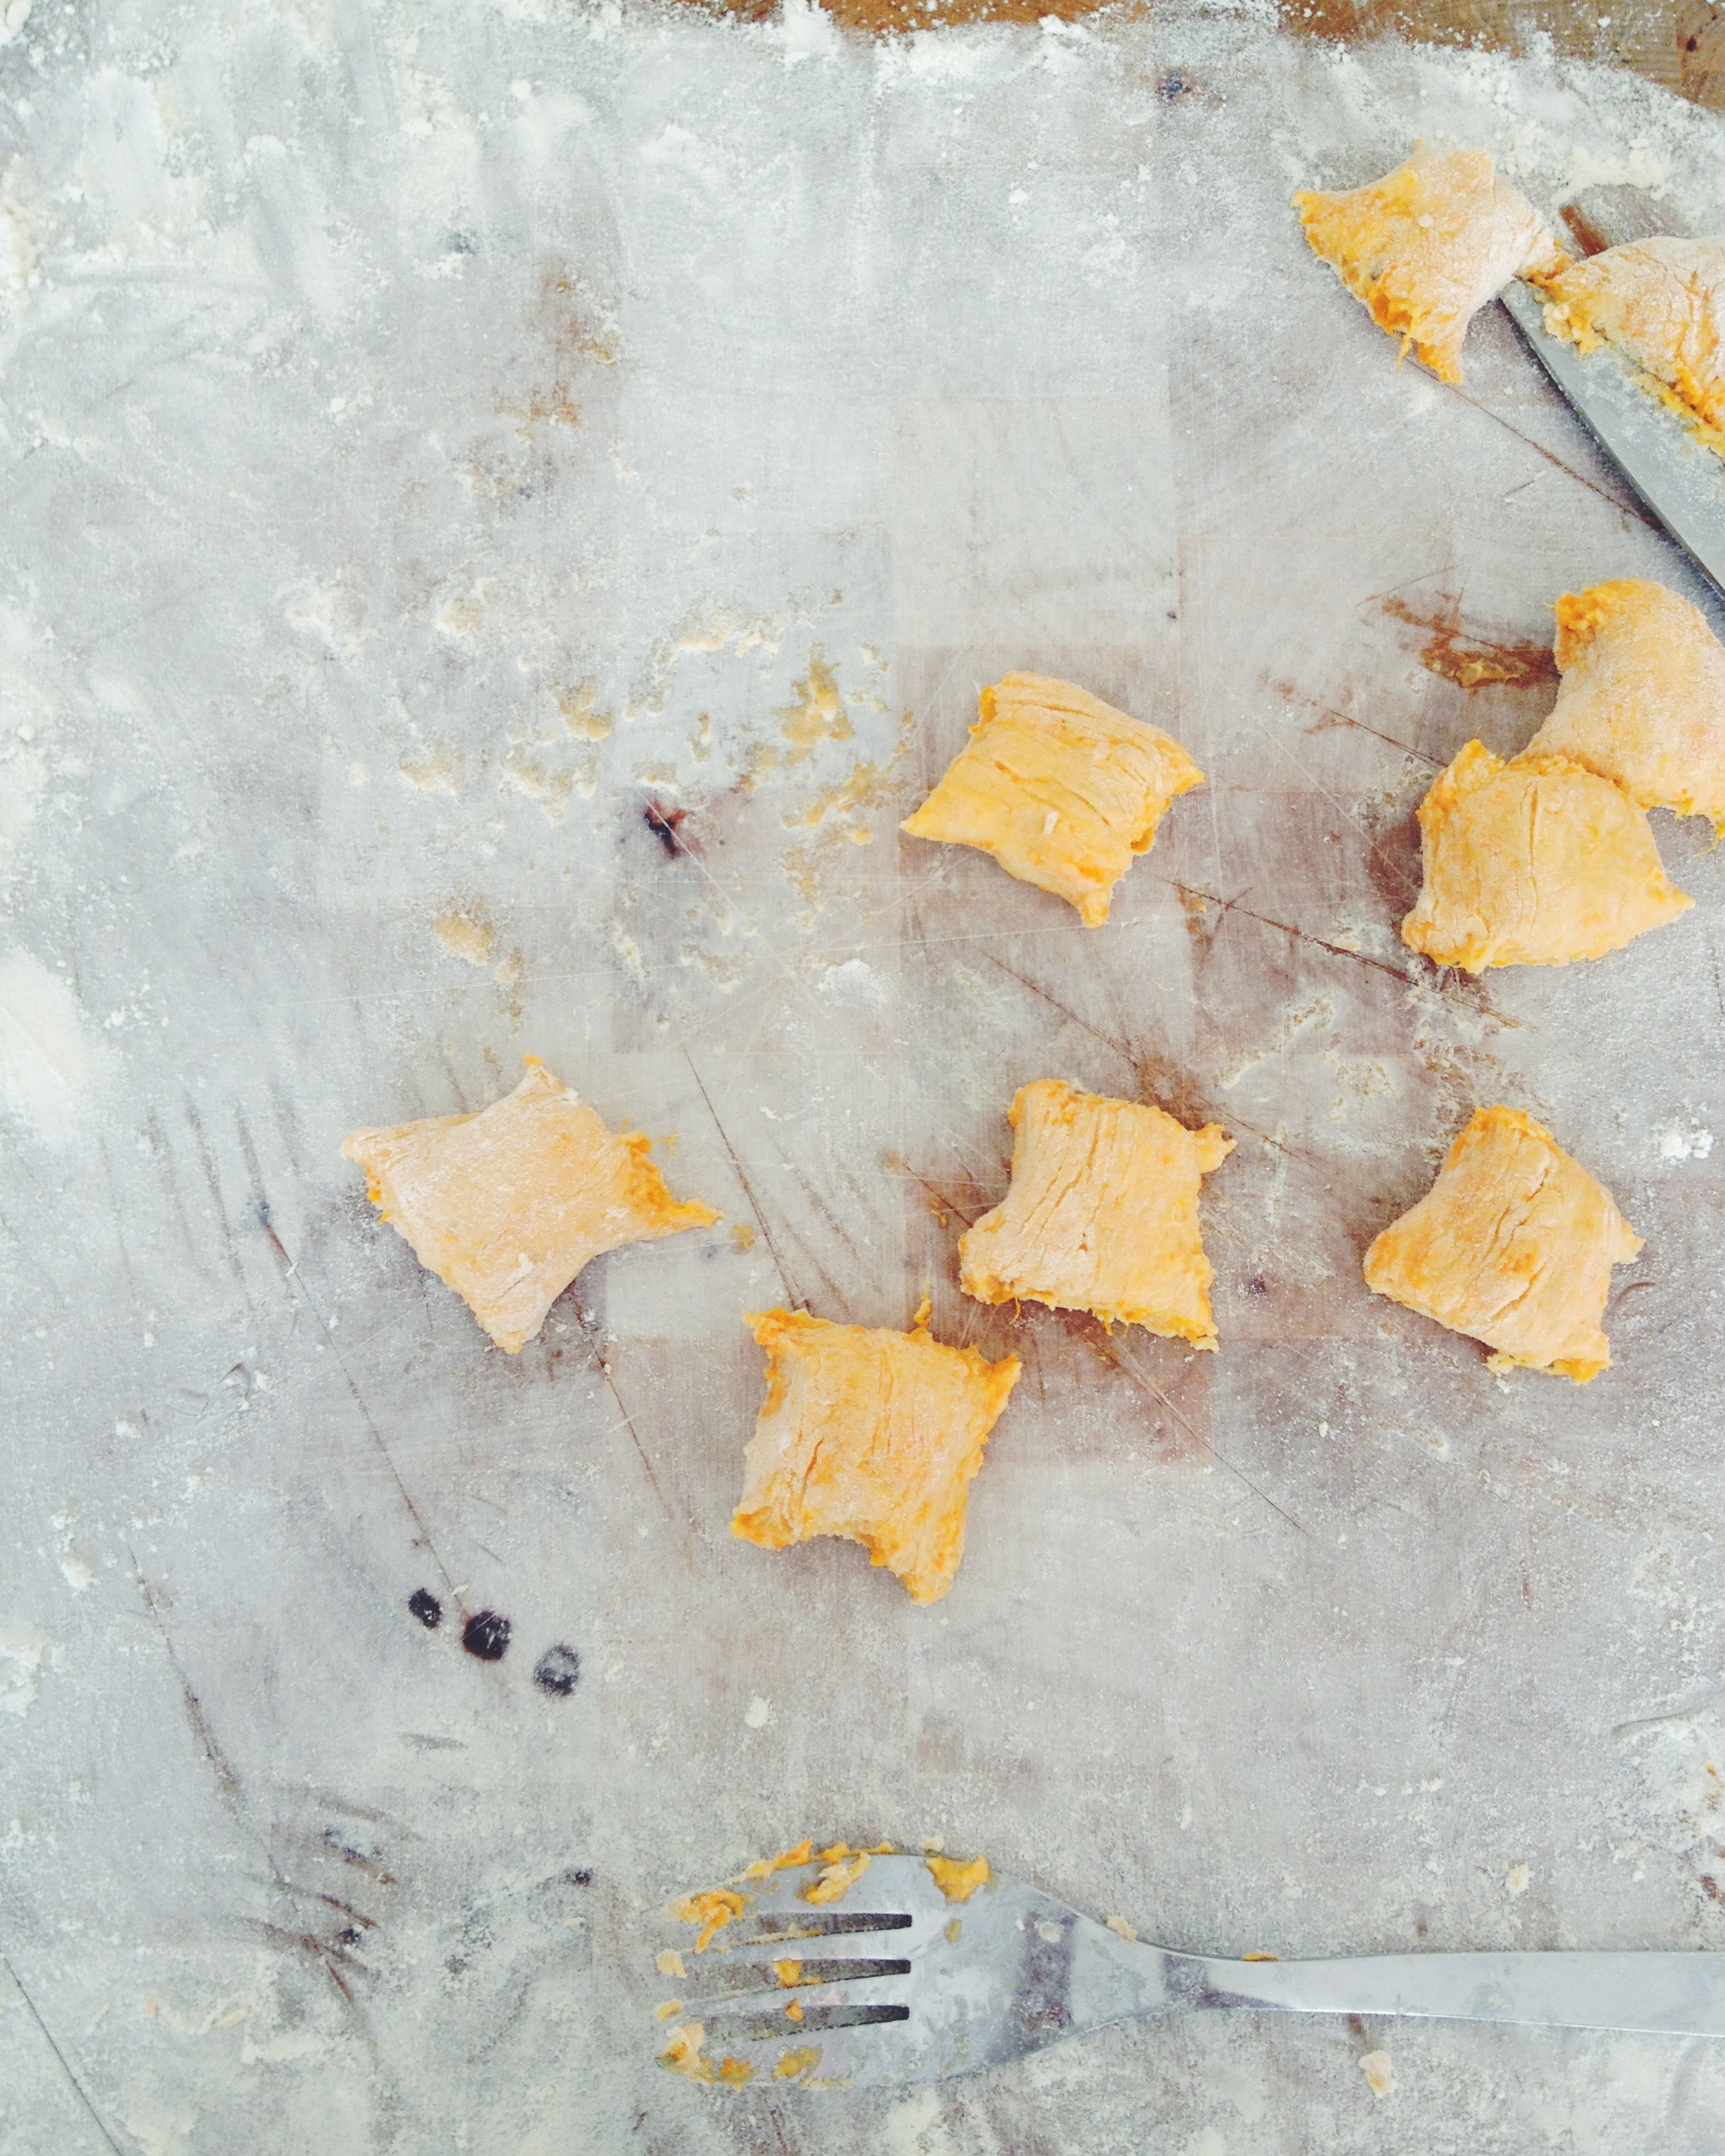
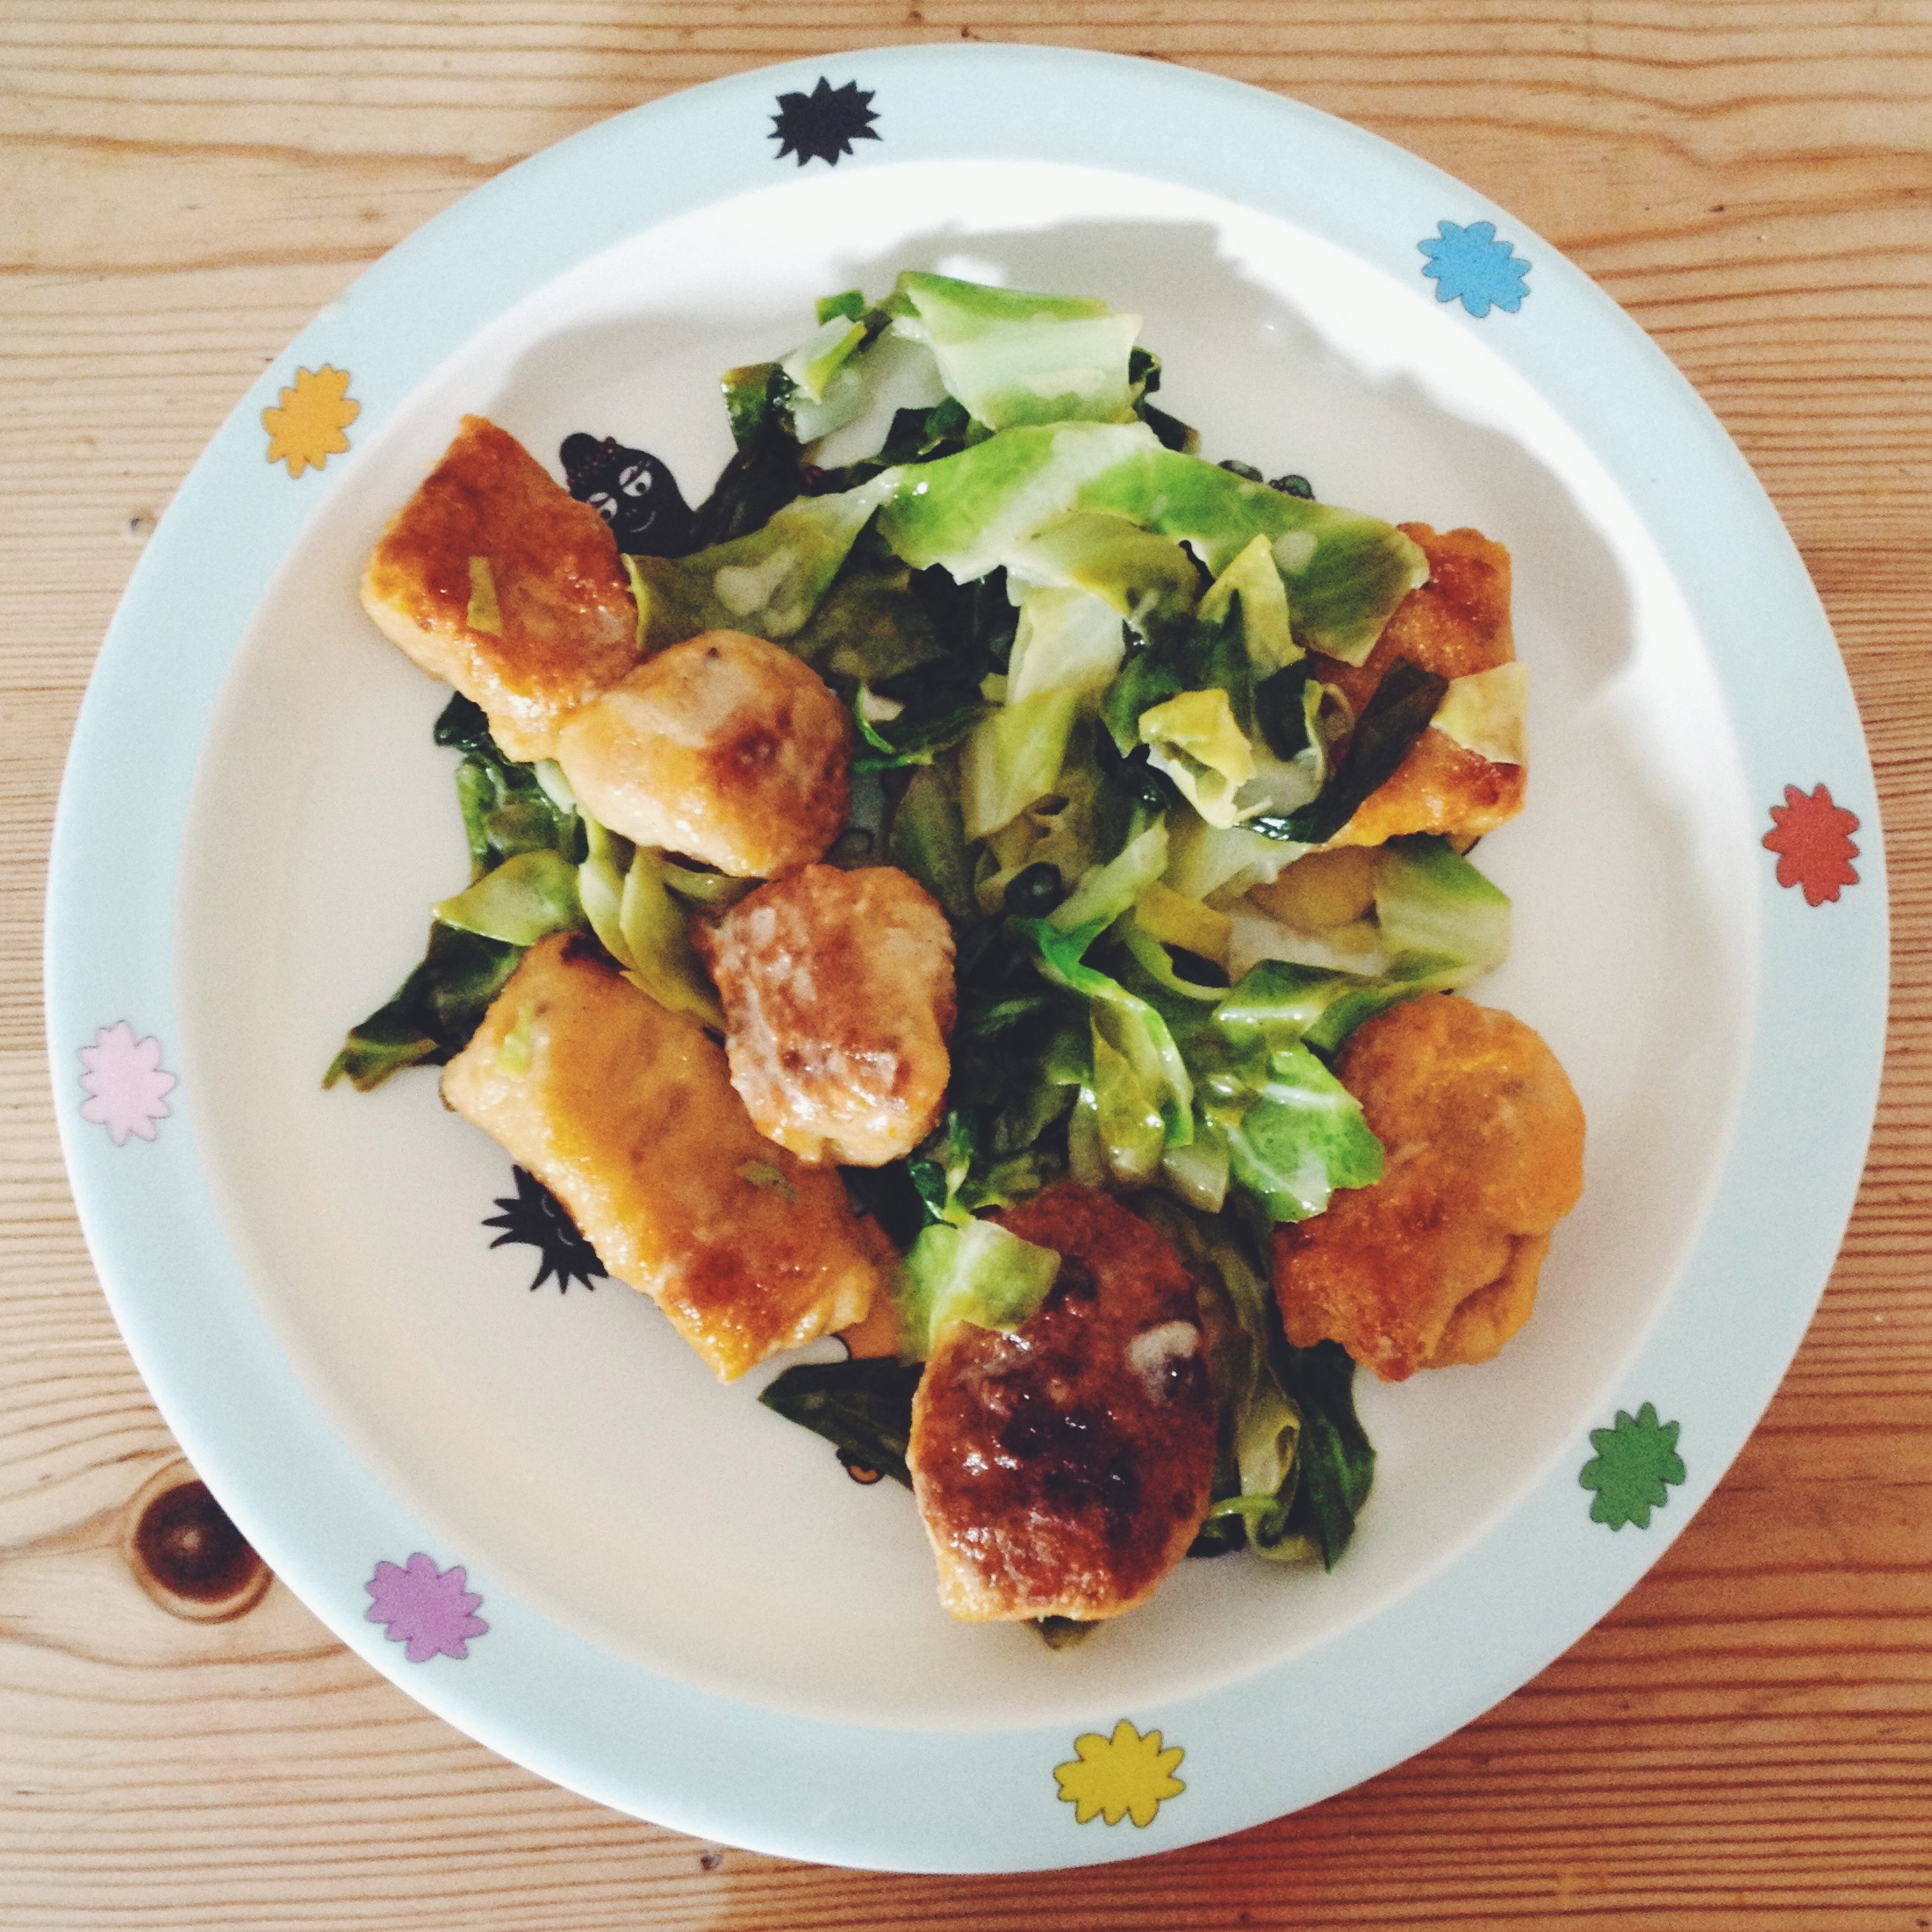
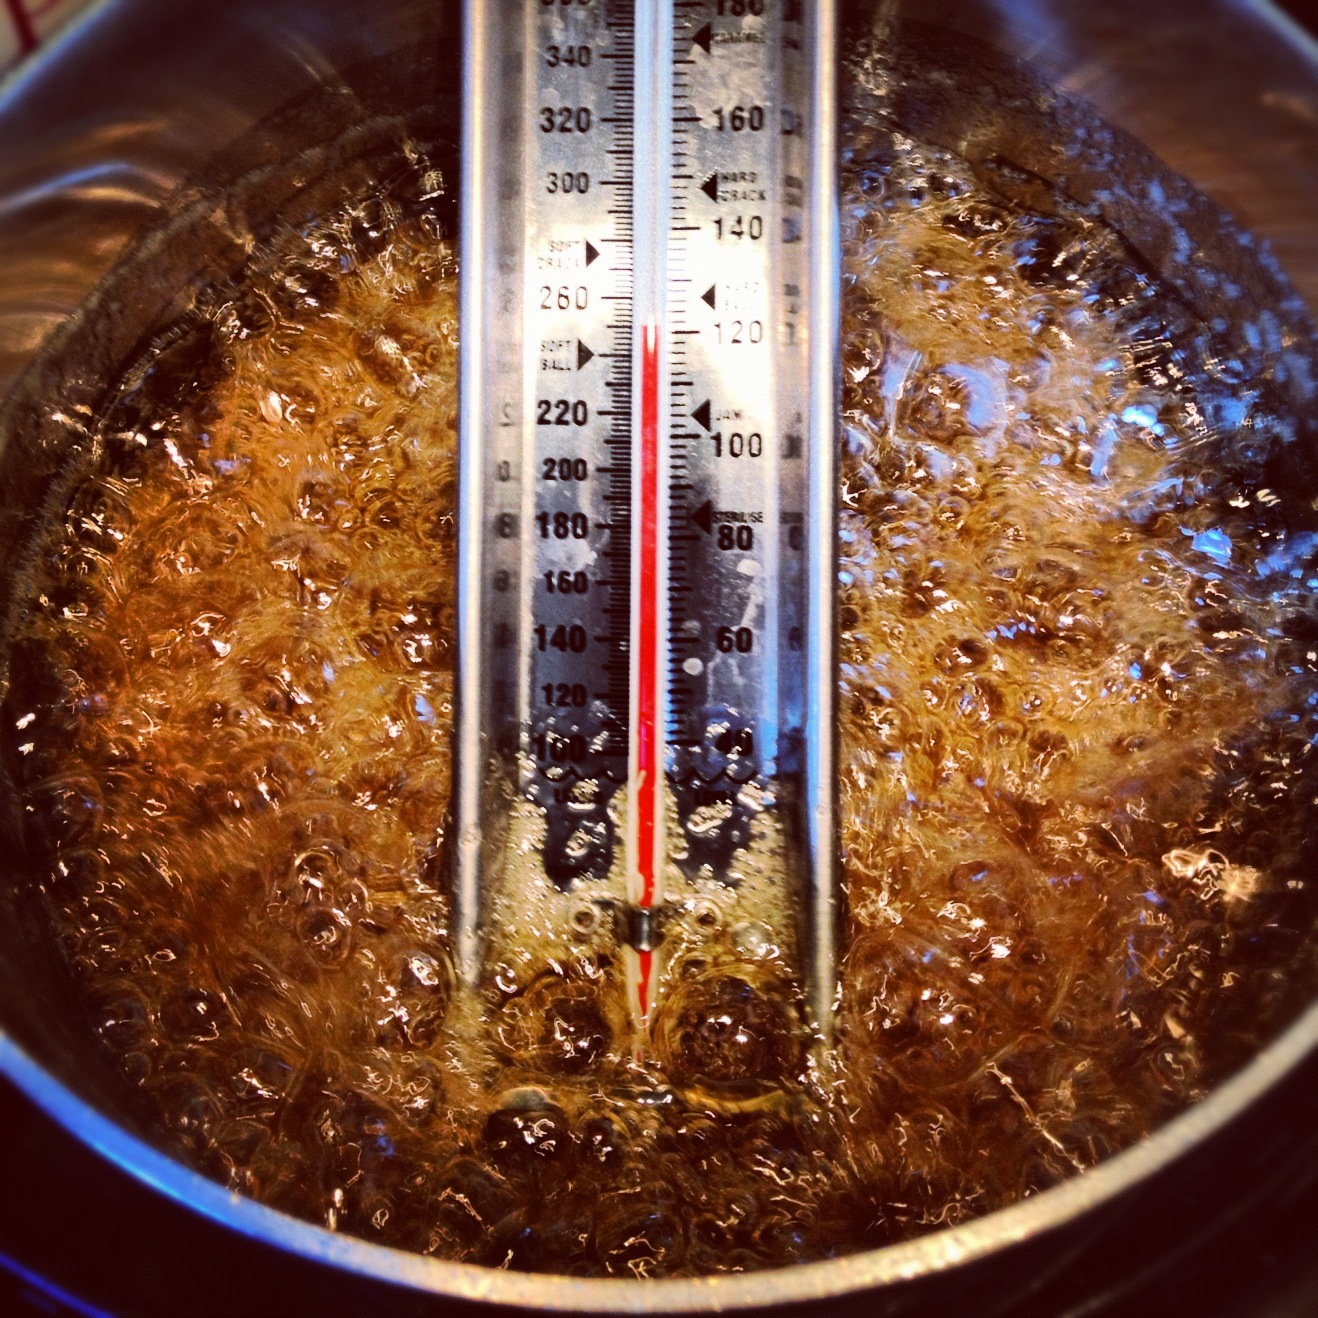
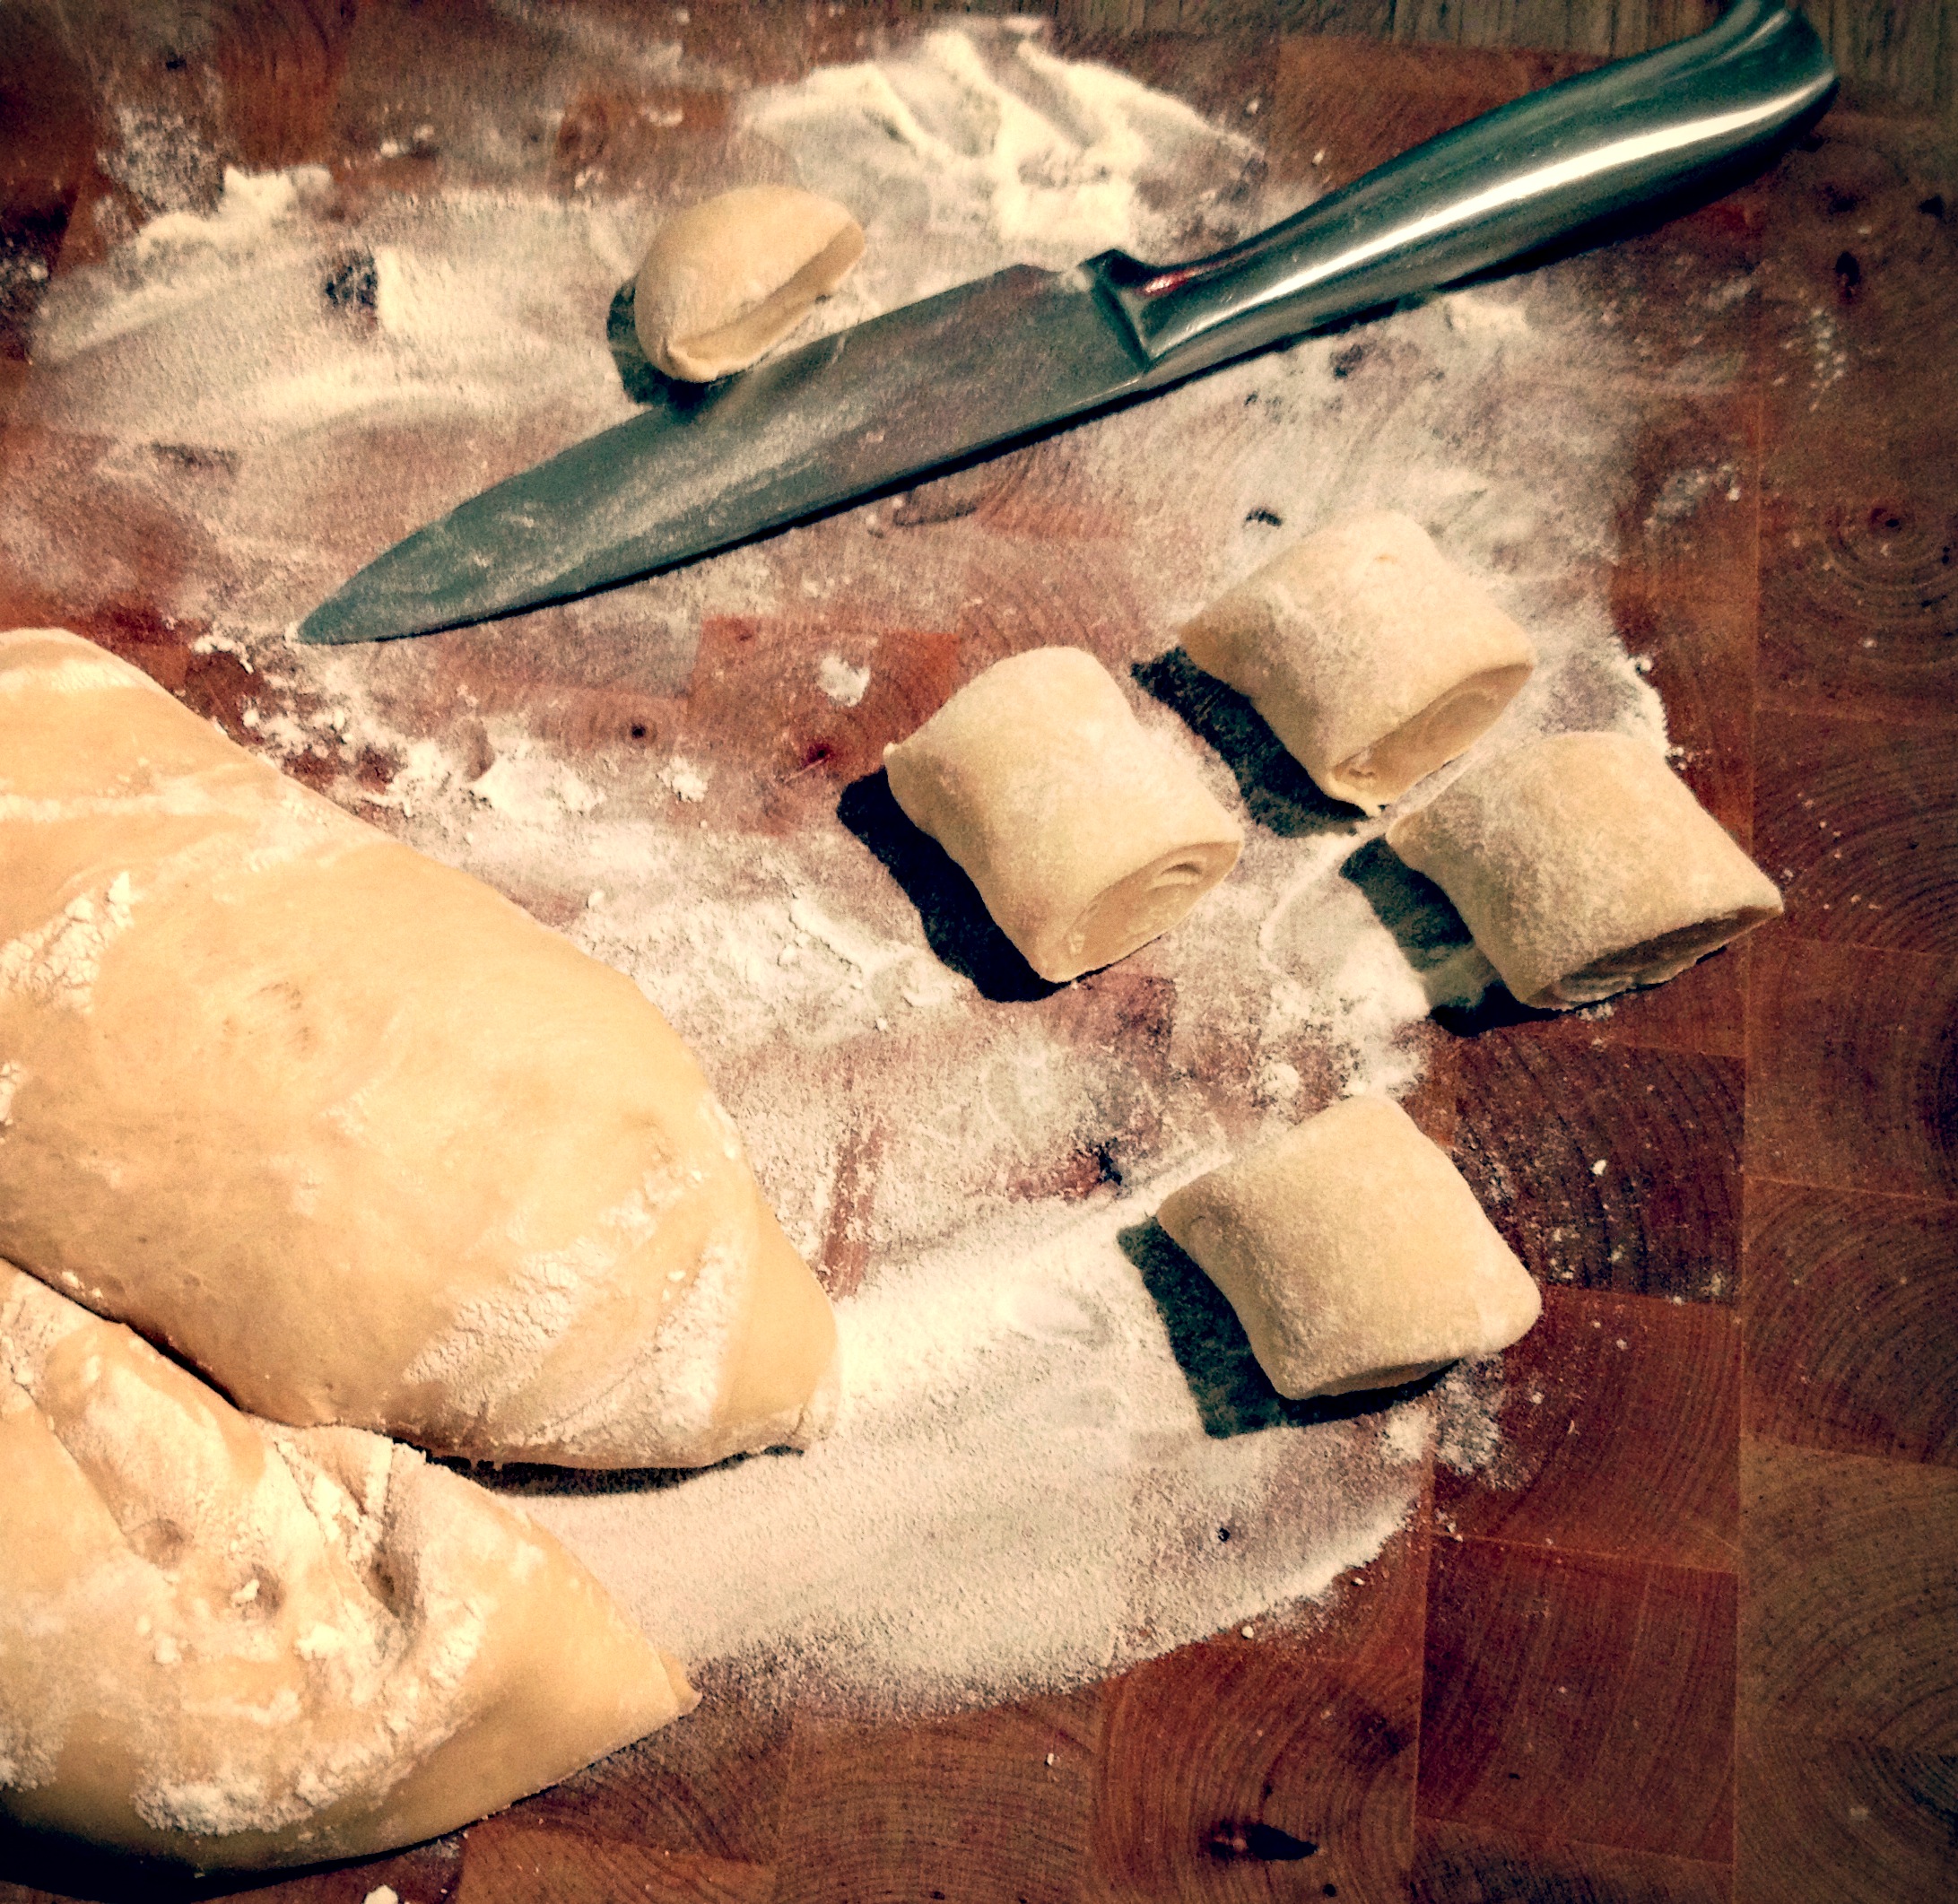
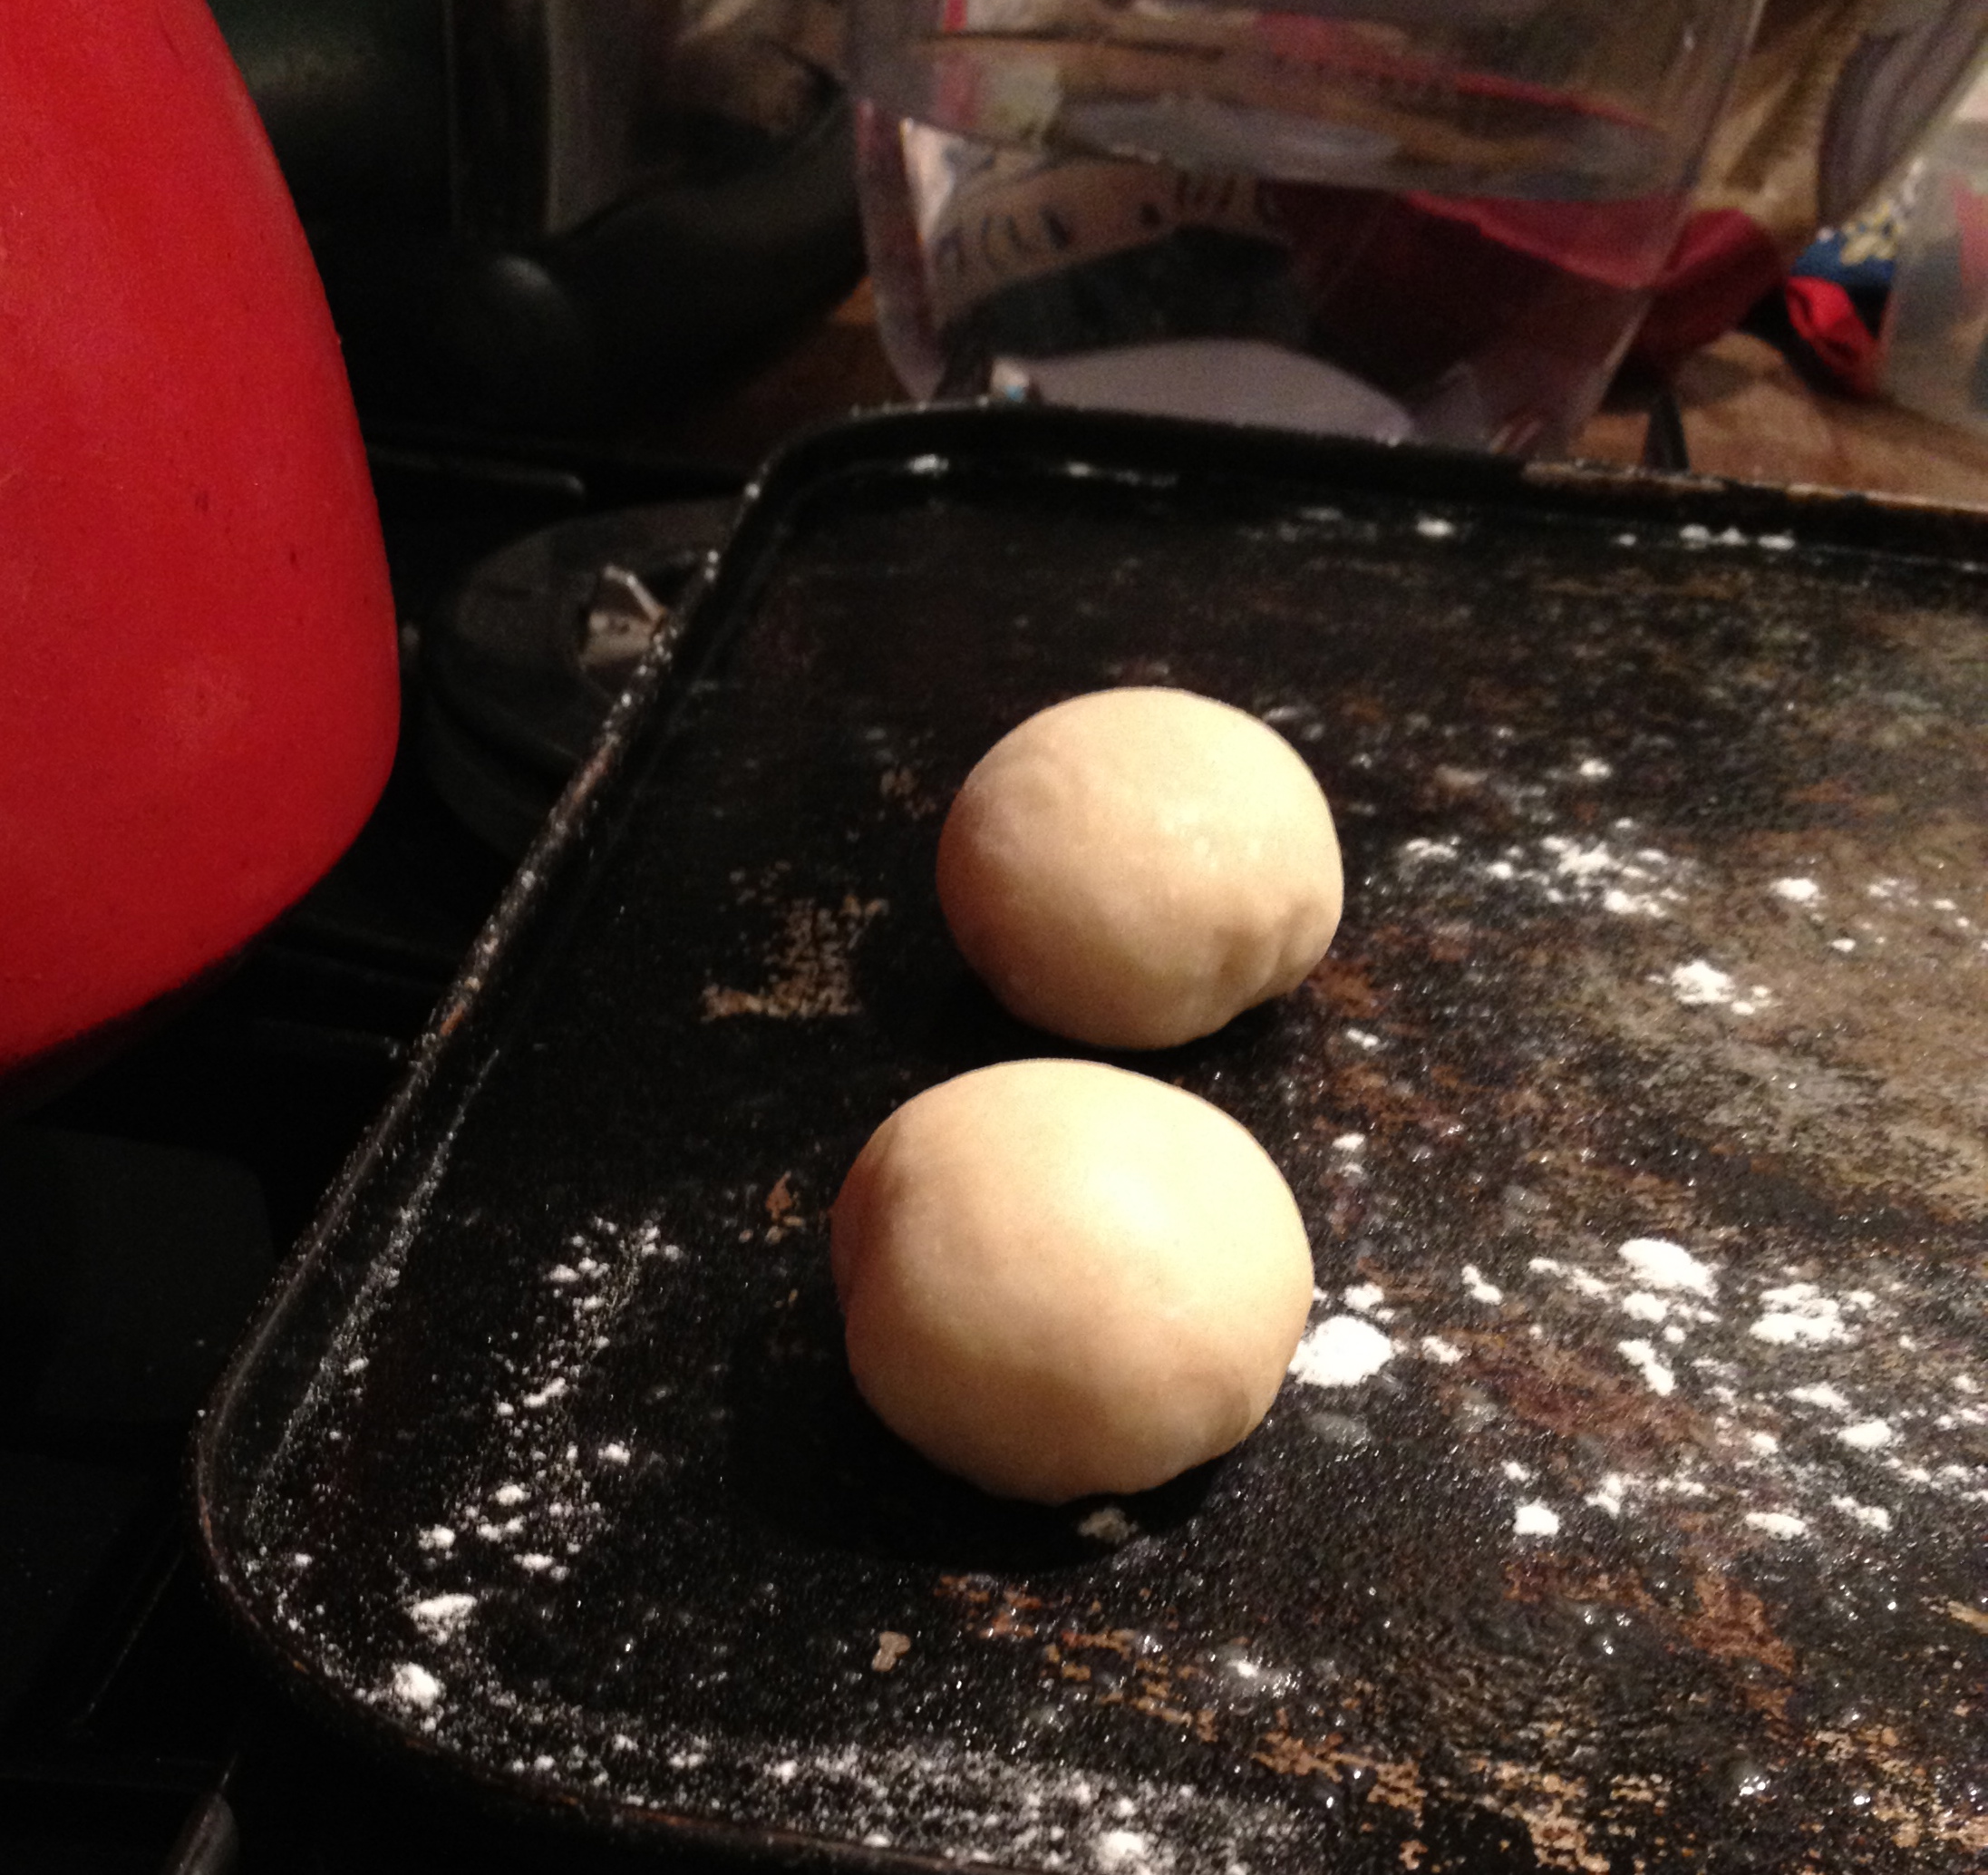
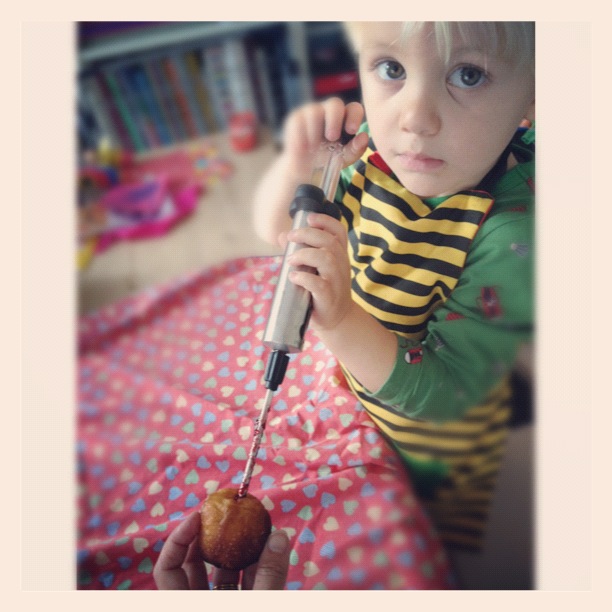
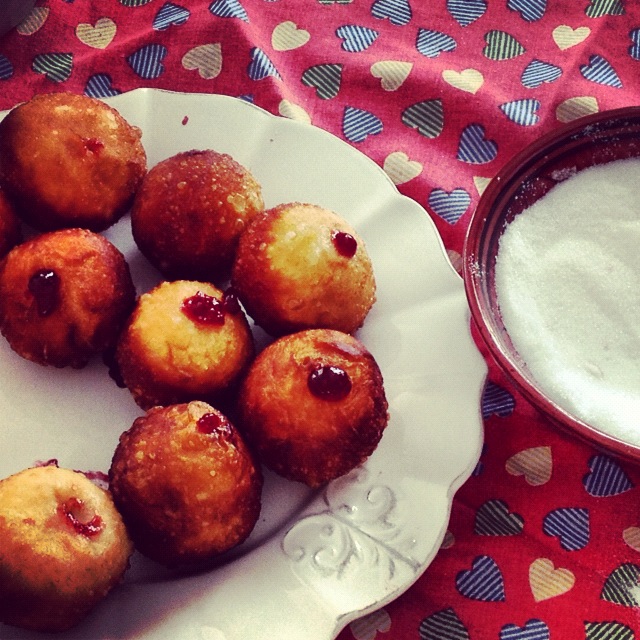
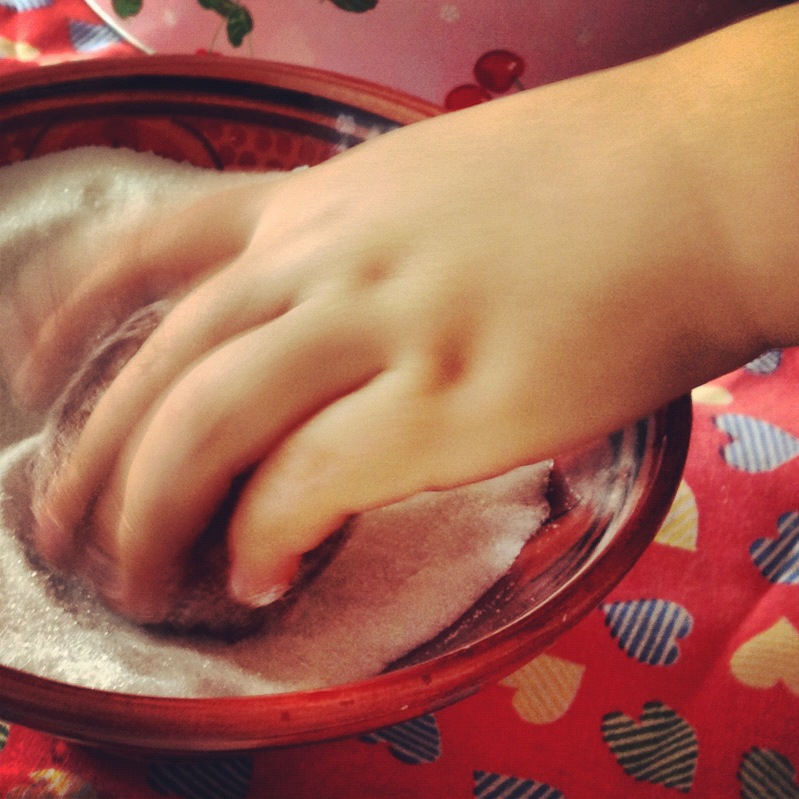
Arancini, which means "little oranges" in Italian, have got to be one of the least time consuming, most enjoyable ways to use up leftovers. Proper, traditional arancini back on their home shores tend to be stuffed with ragu or mozzarella, and you are very welcome to do so too, but regular old balls of any kind of risotto are just fab. The risotto is best if it's been left in the fridge overnight to get really stodgy. Heat oil to 170-190 degrees (best if you have a thermometer to check, but if not then give it about 5 mins and then chuck a breadcrumb in and make sure it sizzles instantly.) Then you simply roll the risotto into little balls, dip them to coat with beaten egg, roll them in breadcrumbs and deep fry. The whole process takes no longer than ten minutes, and is nice and quick to tidy up. 

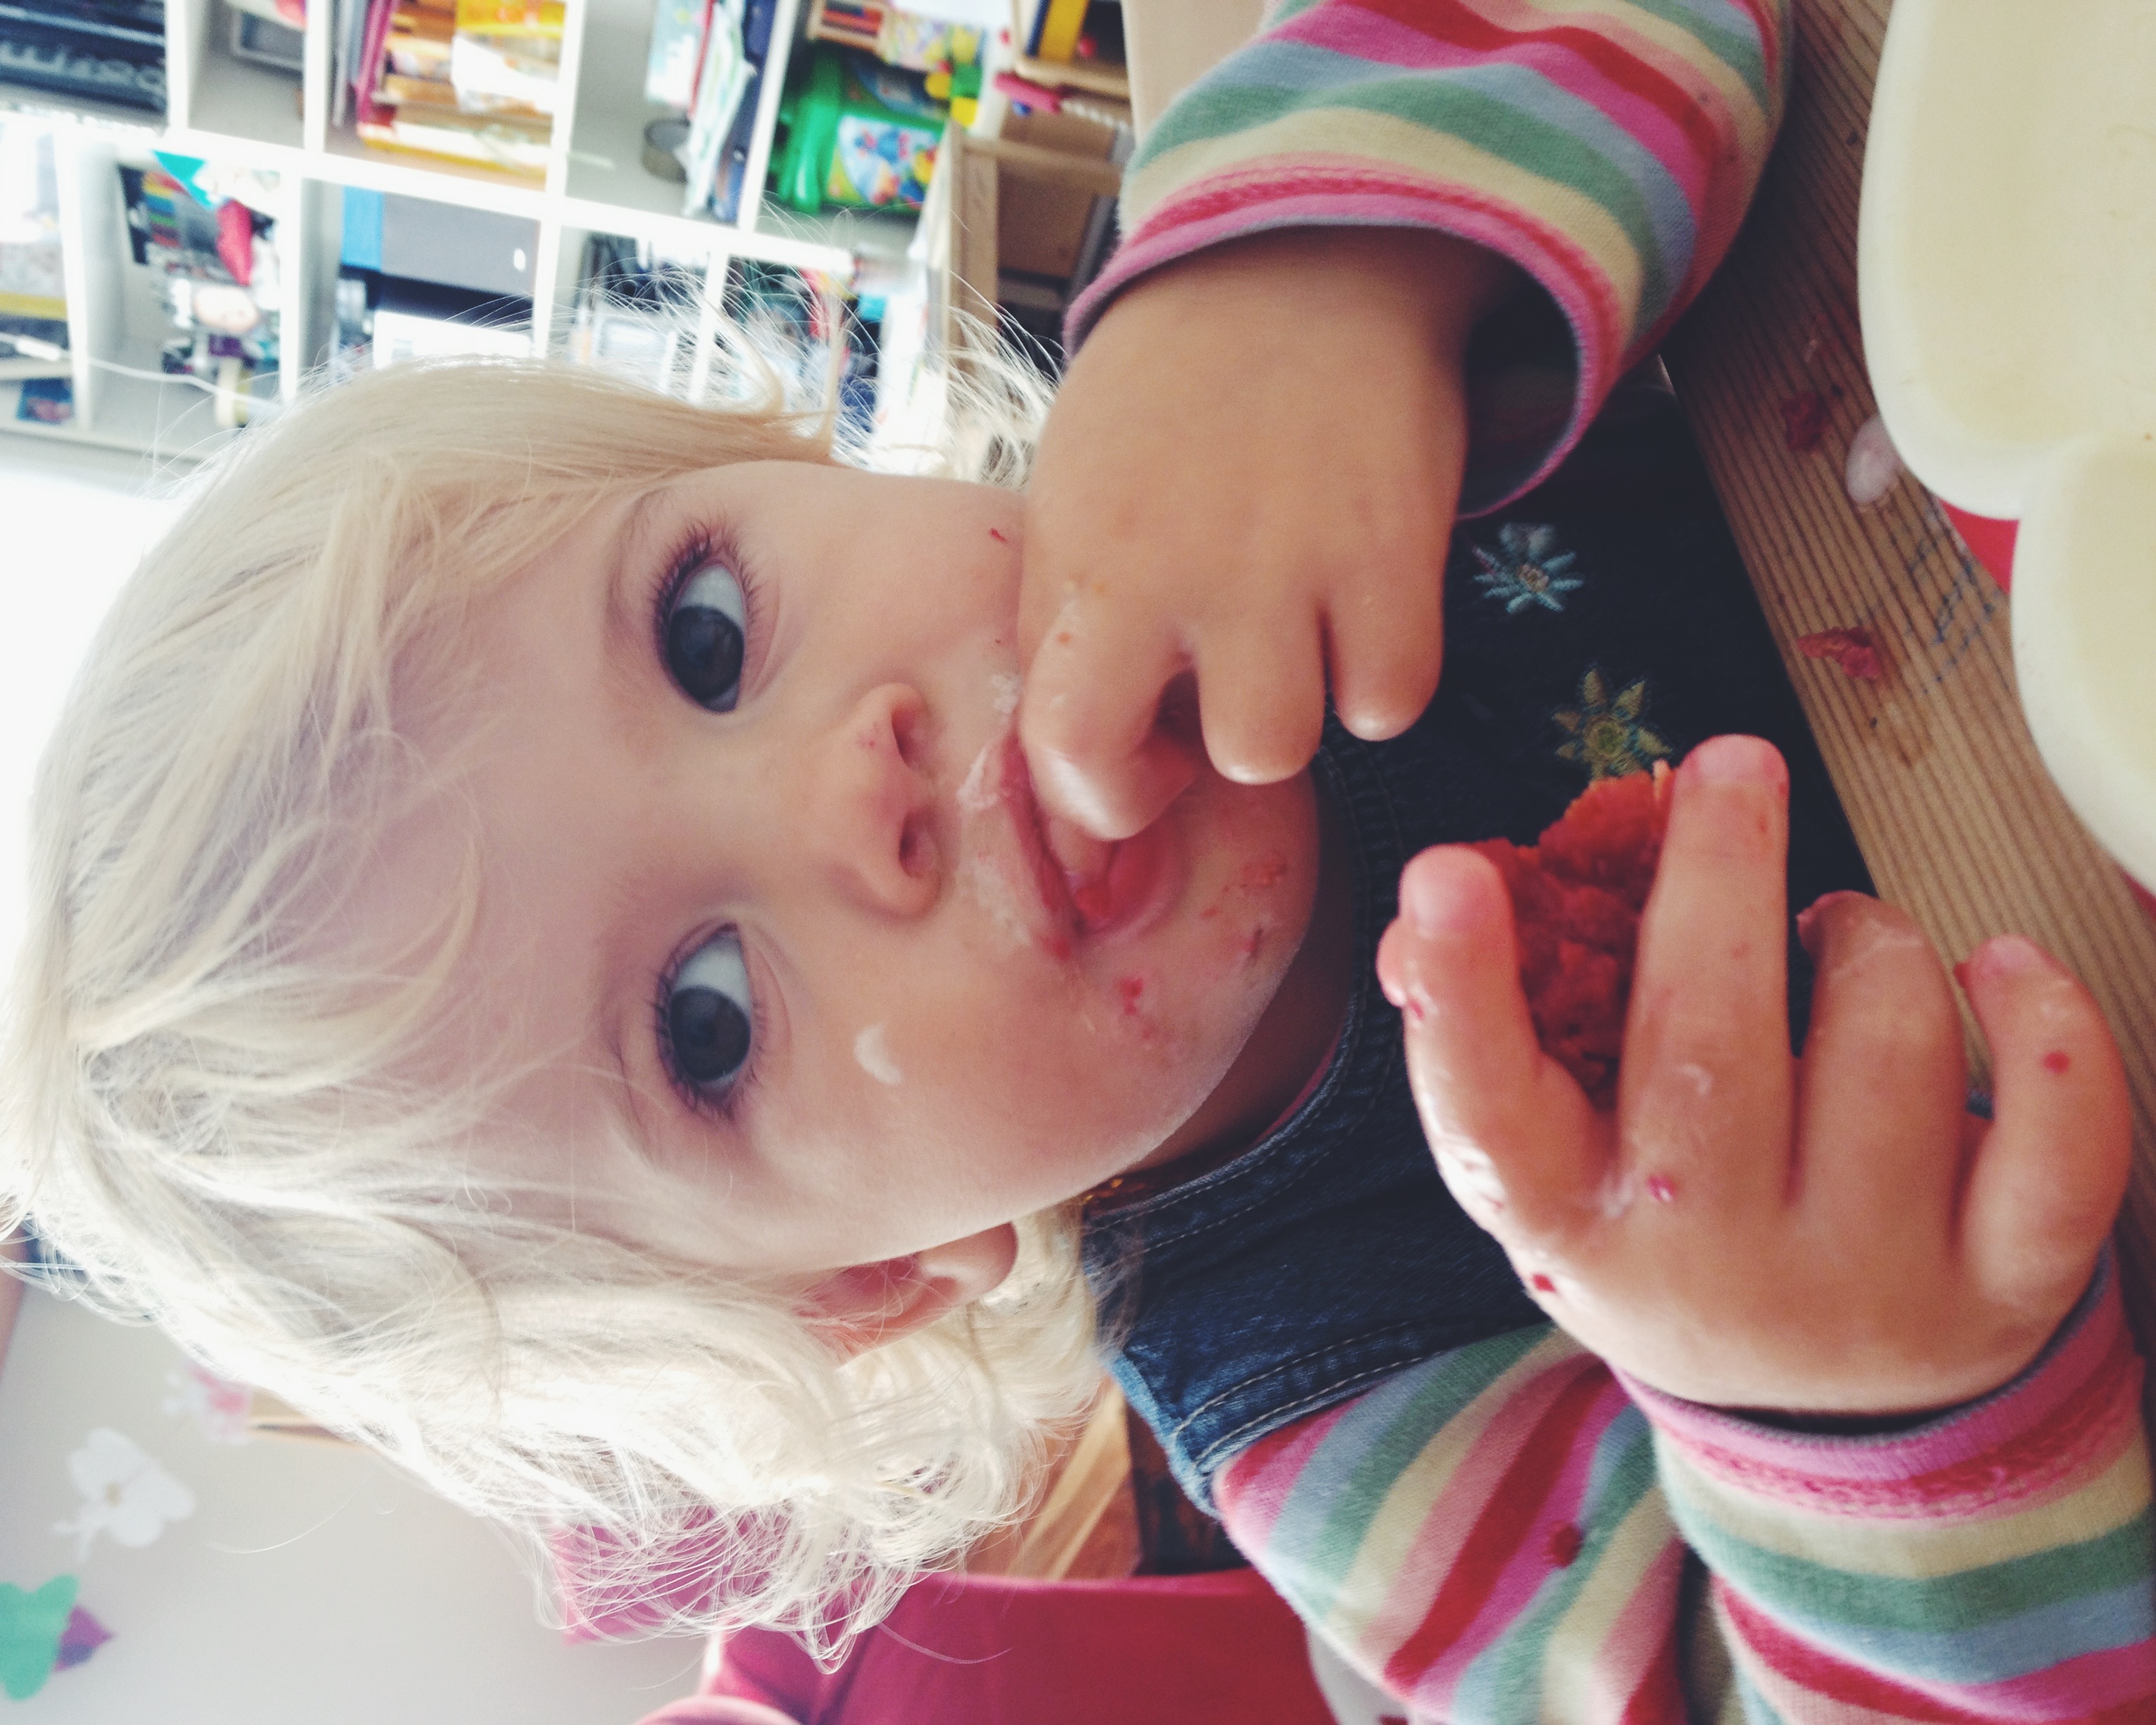
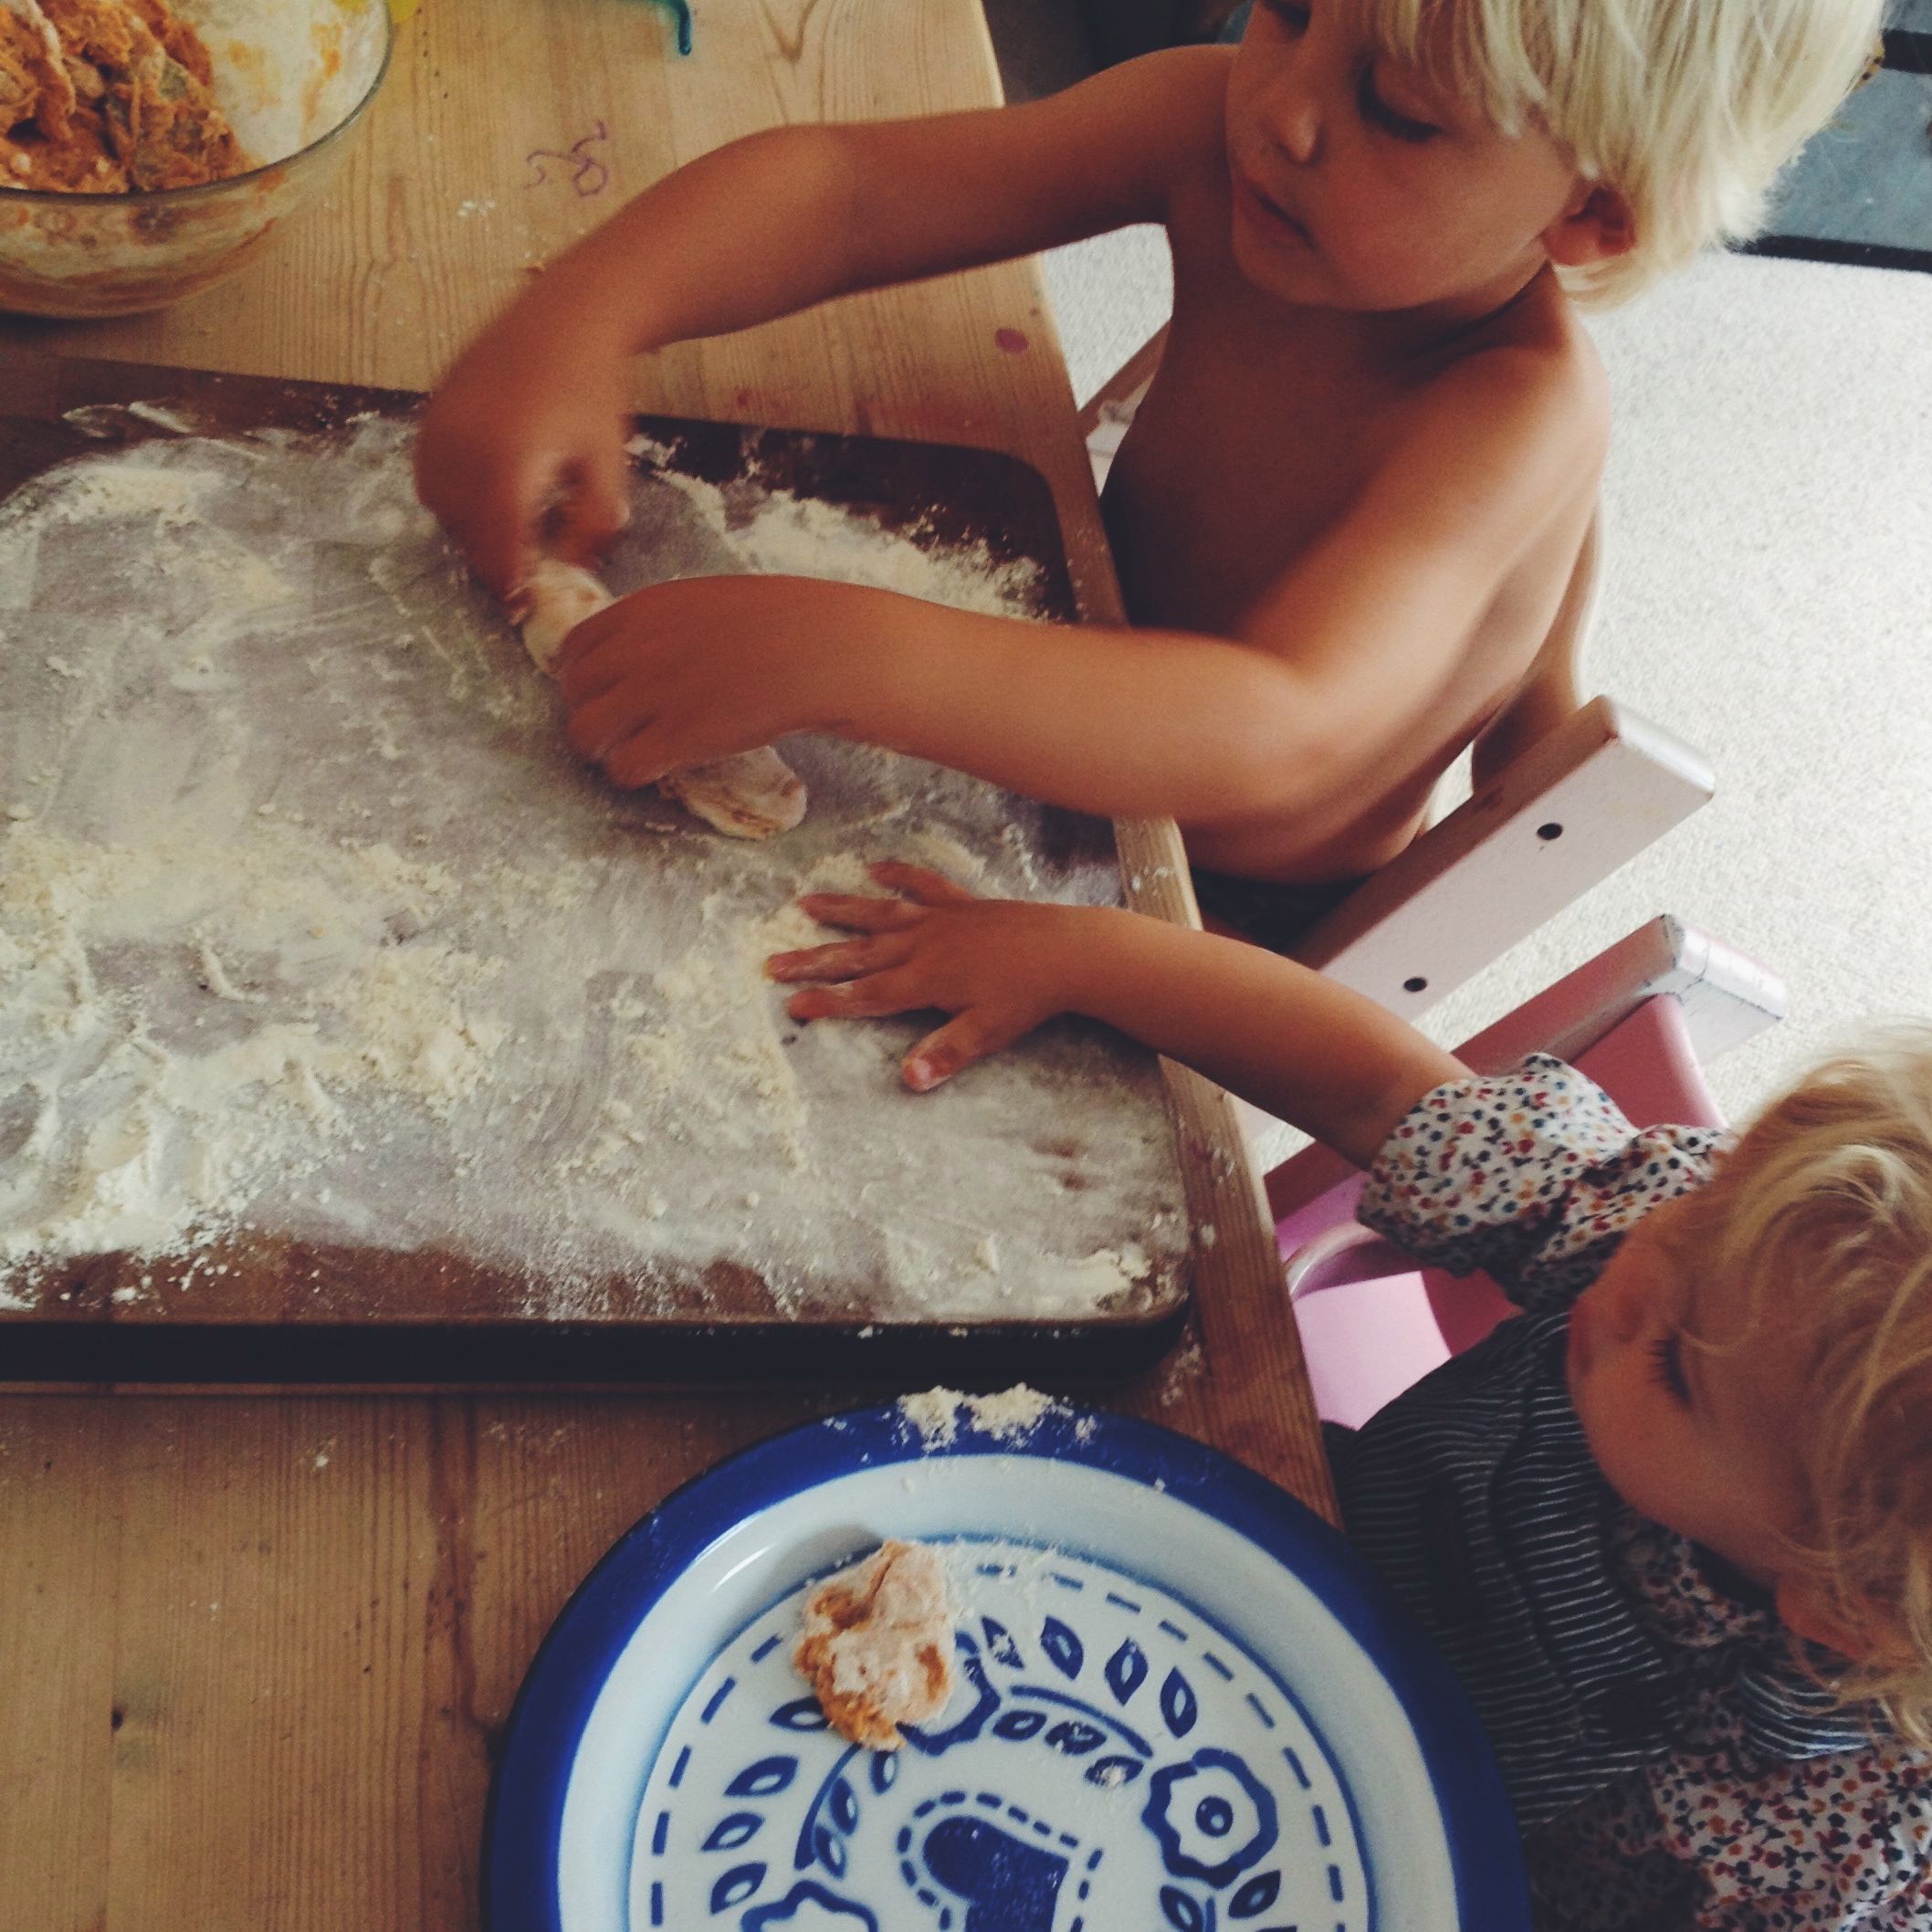
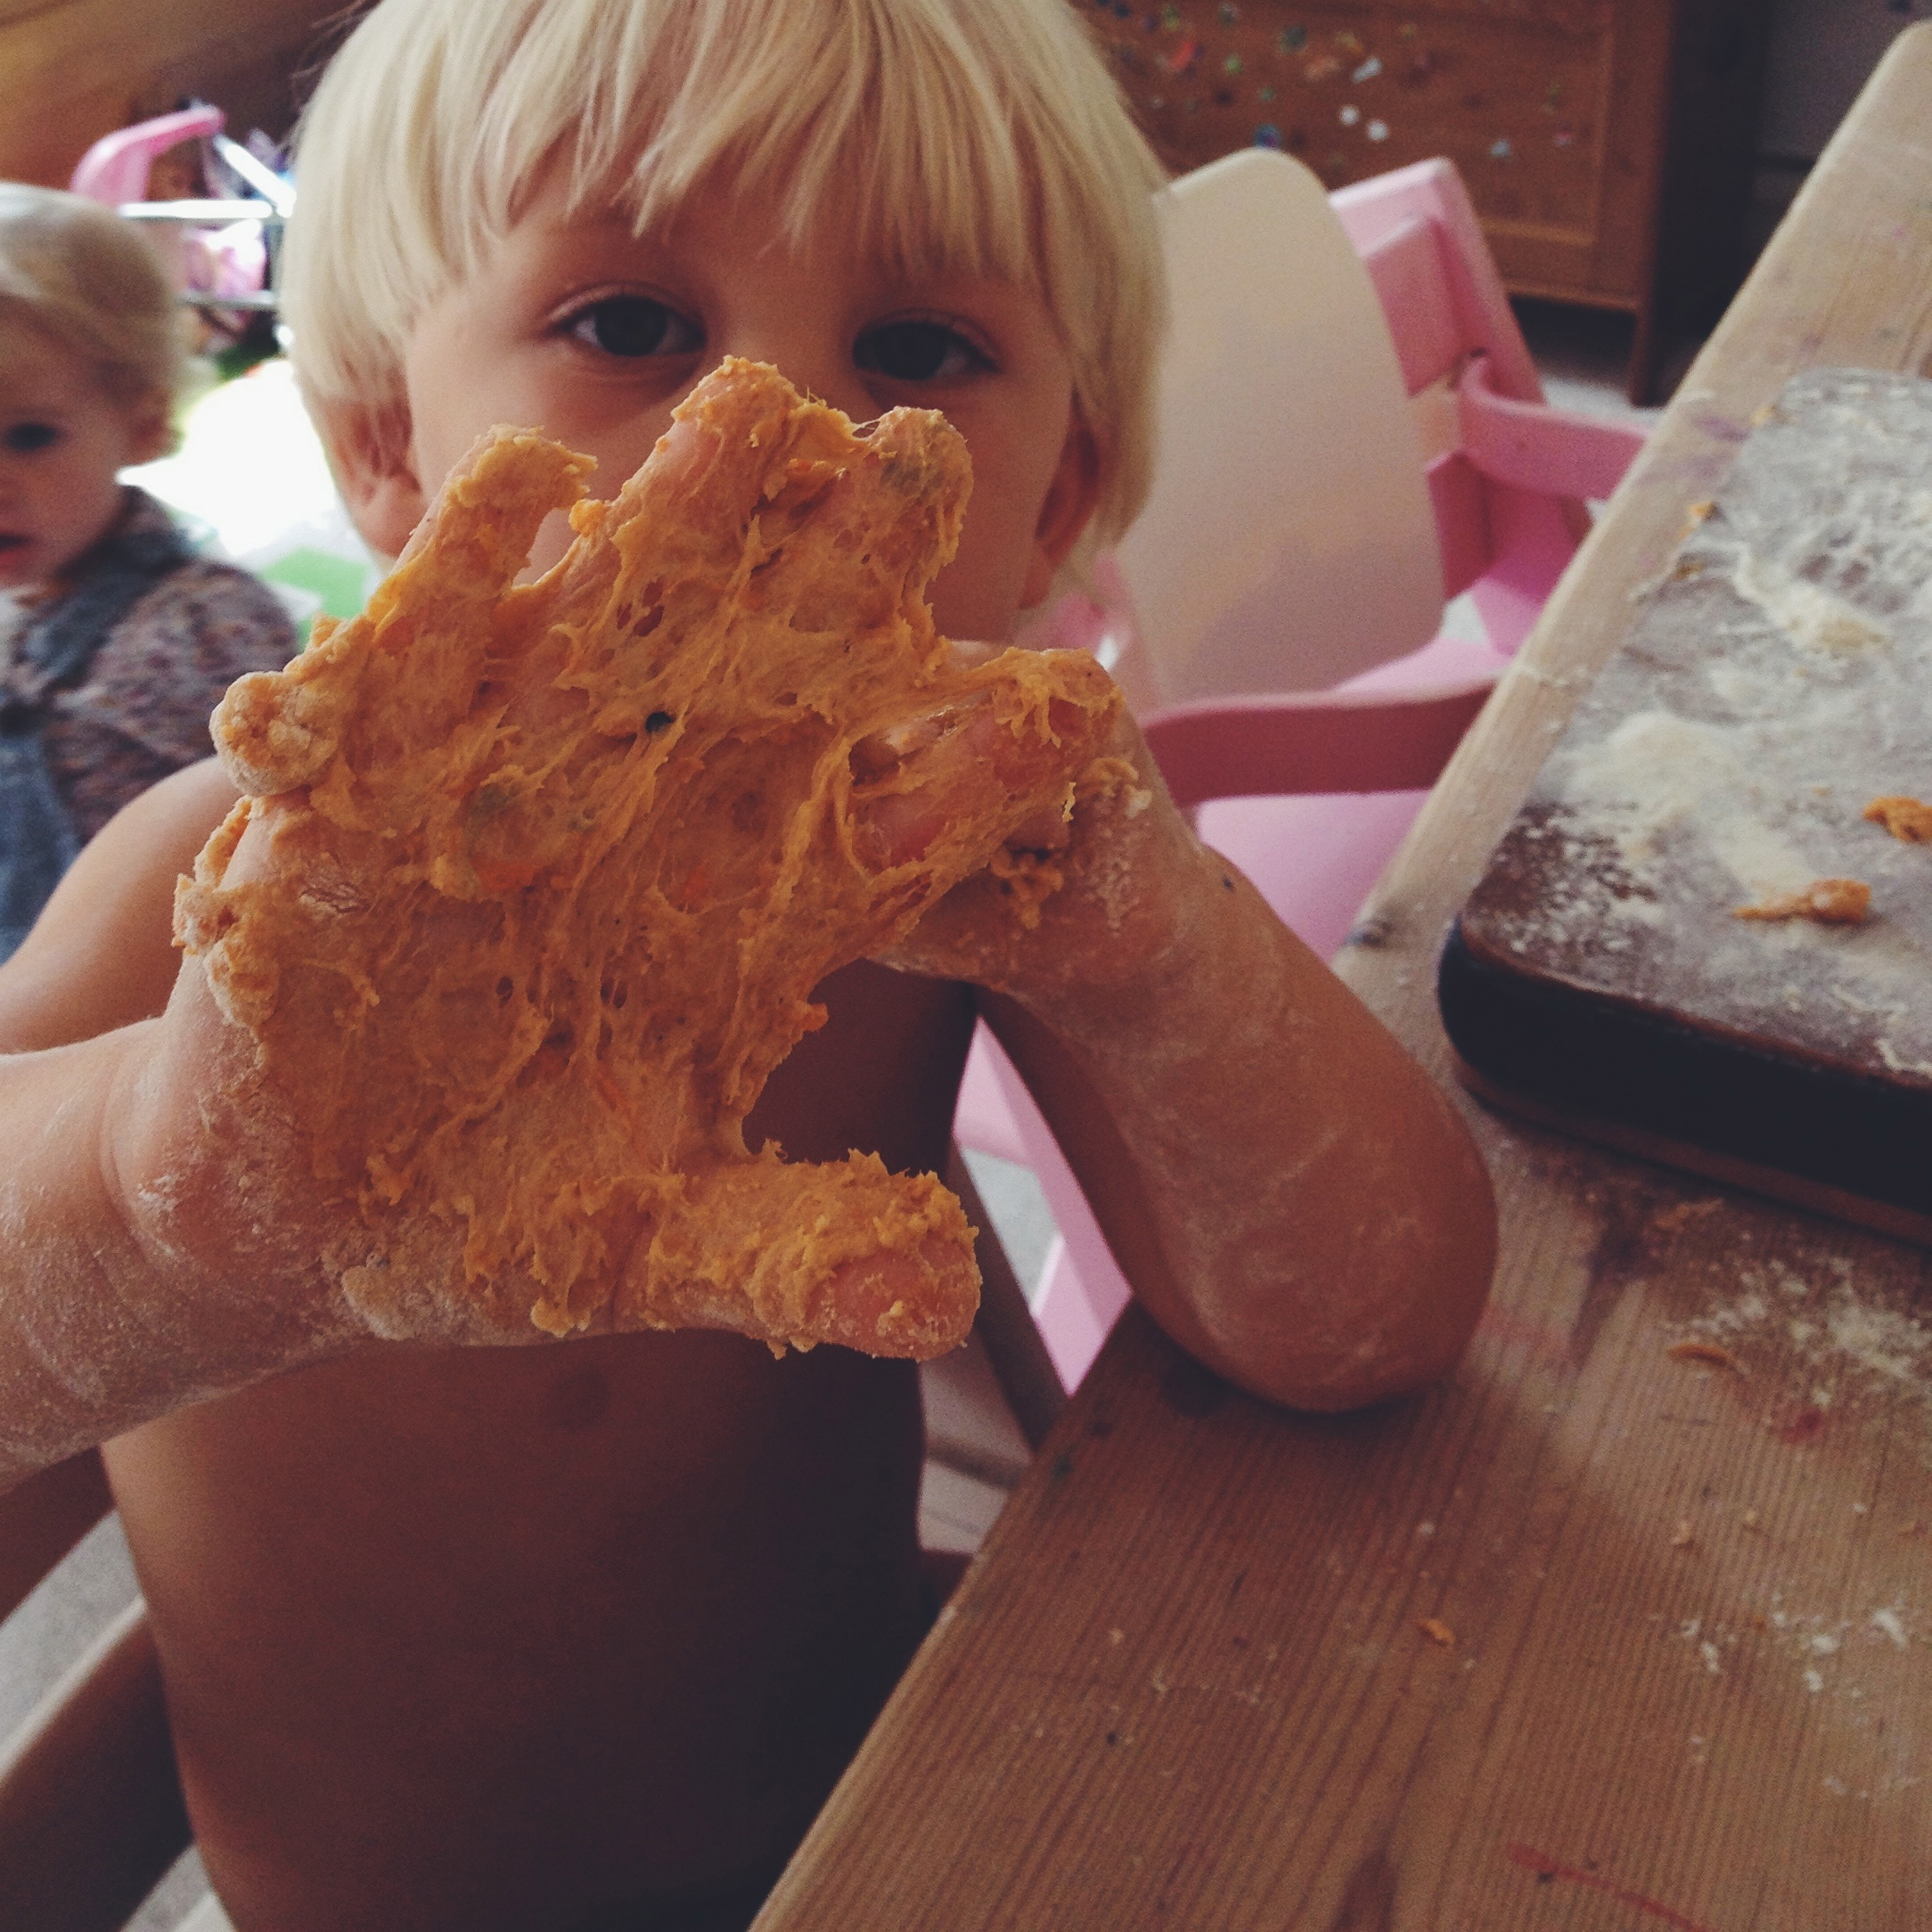
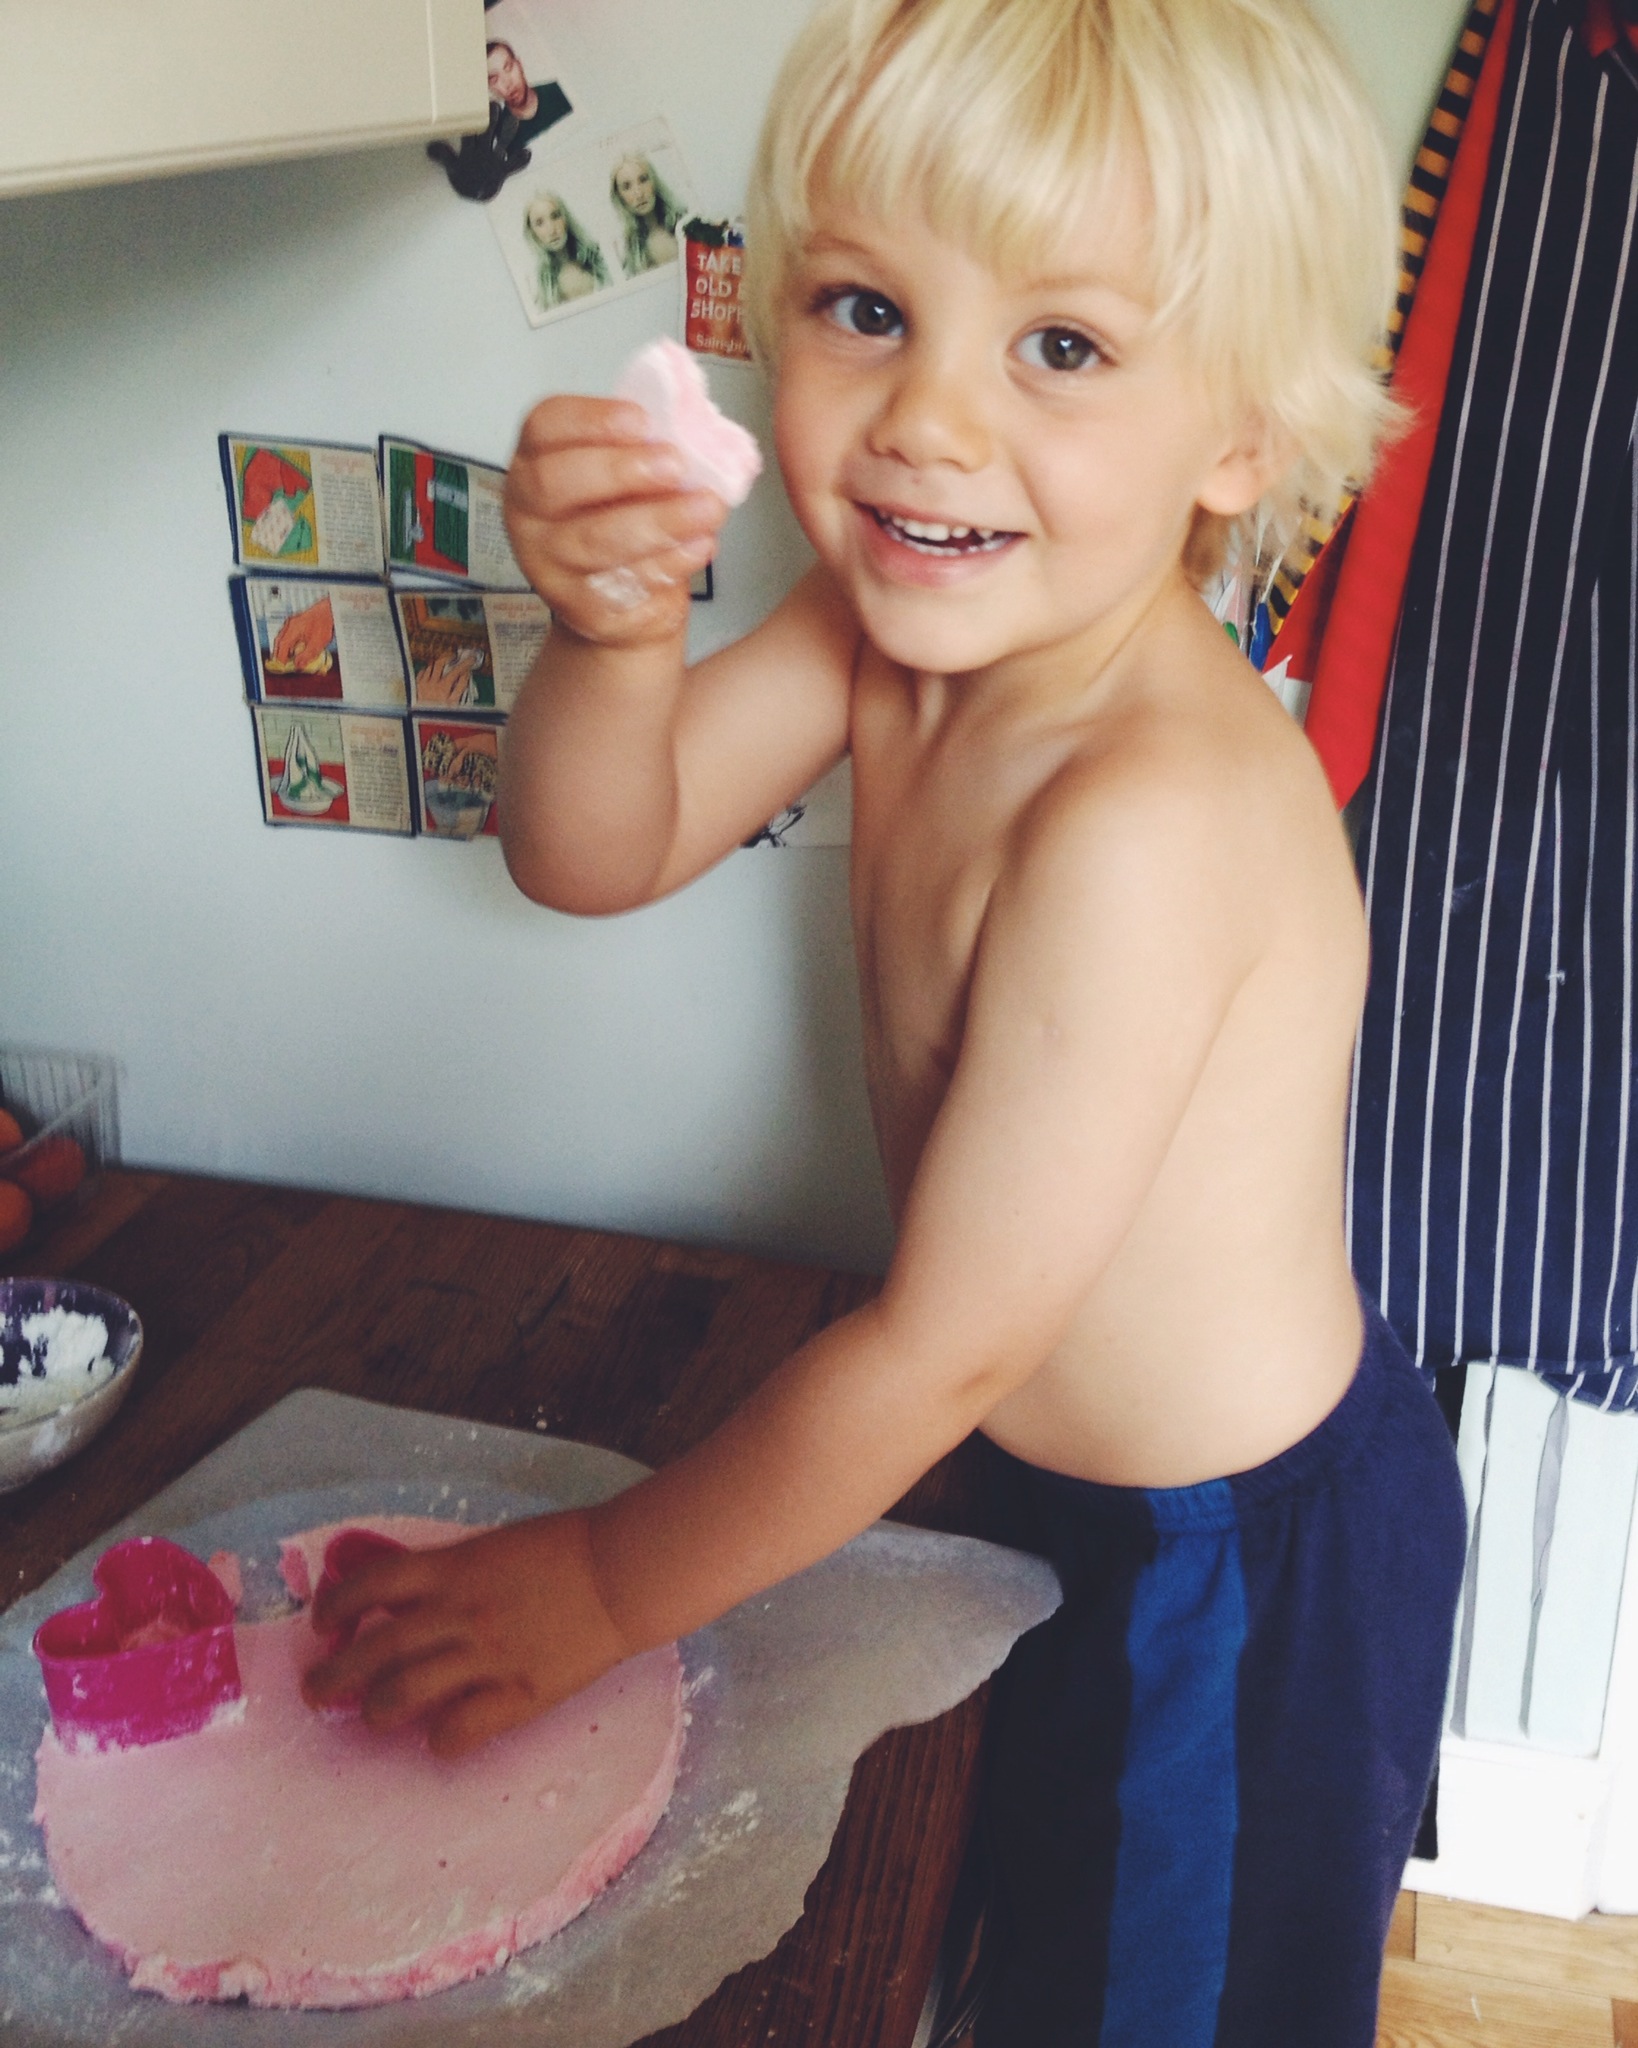
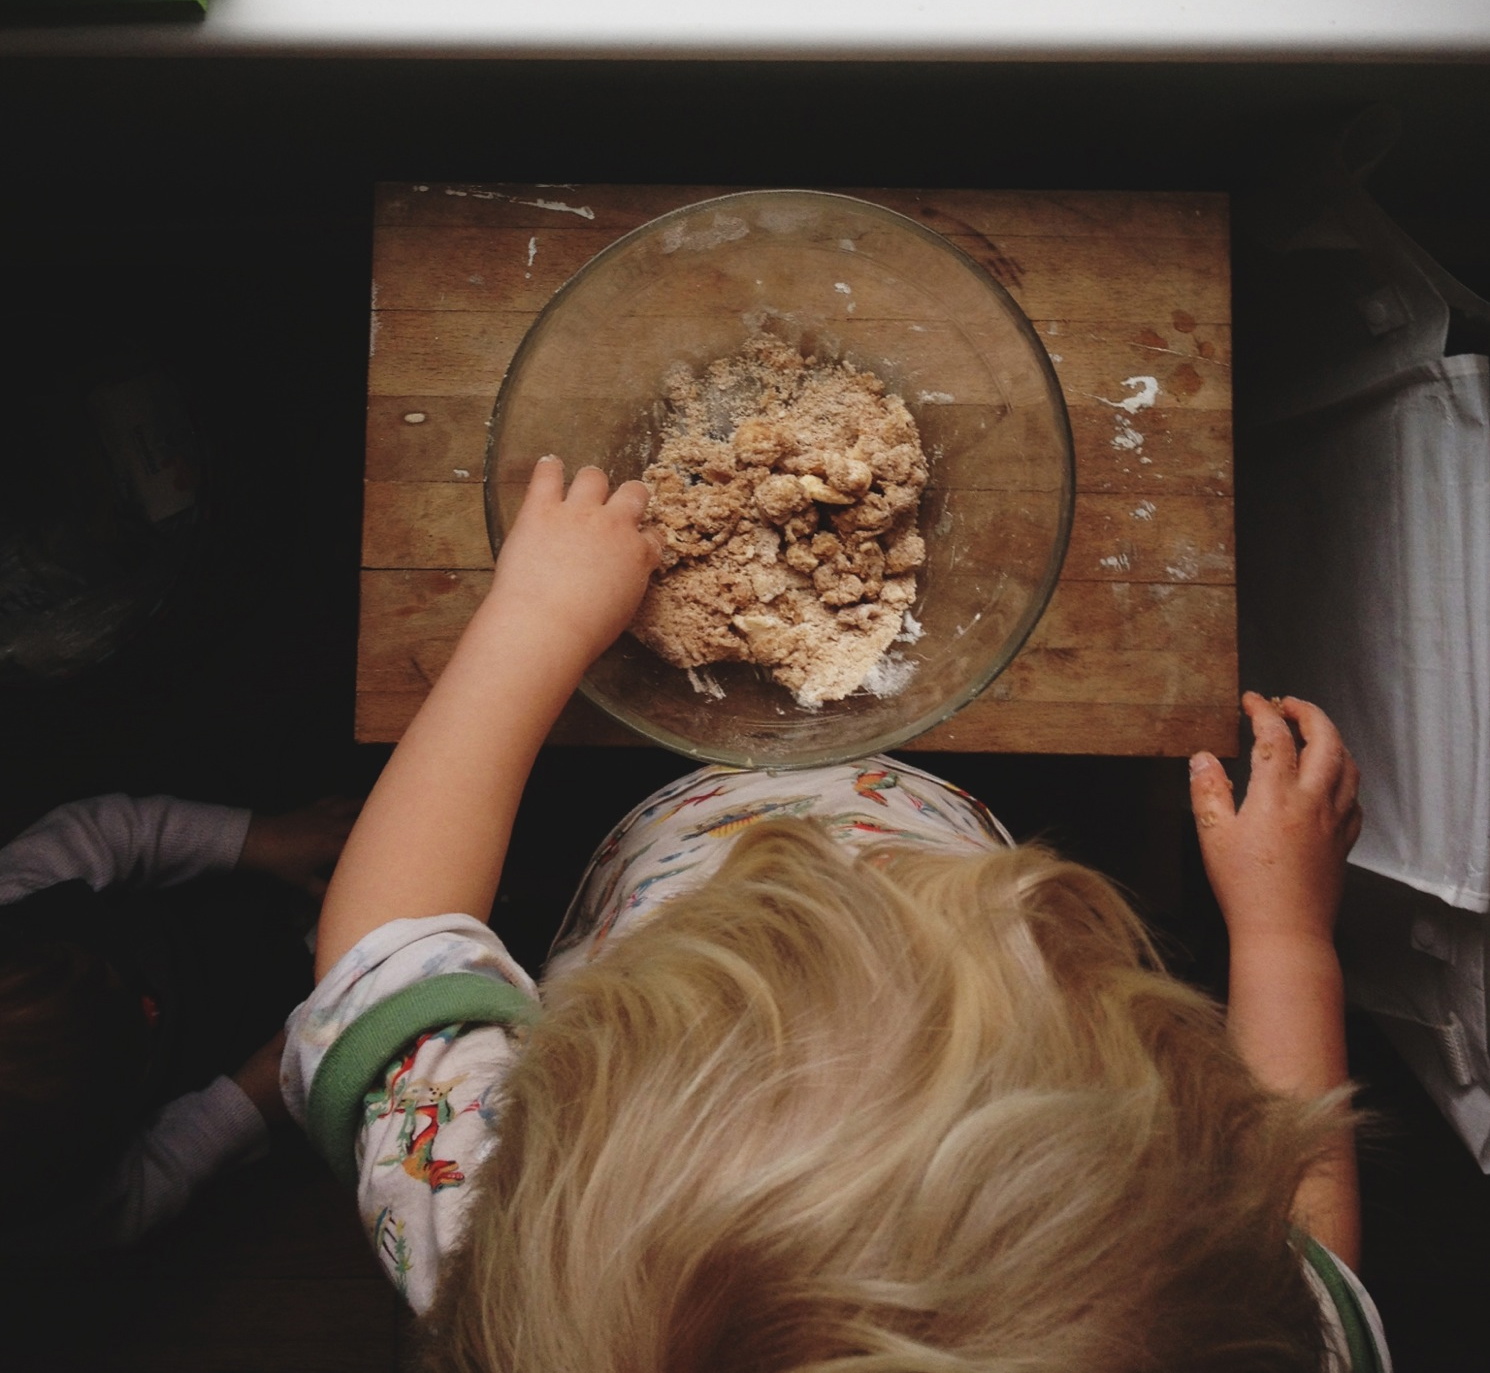
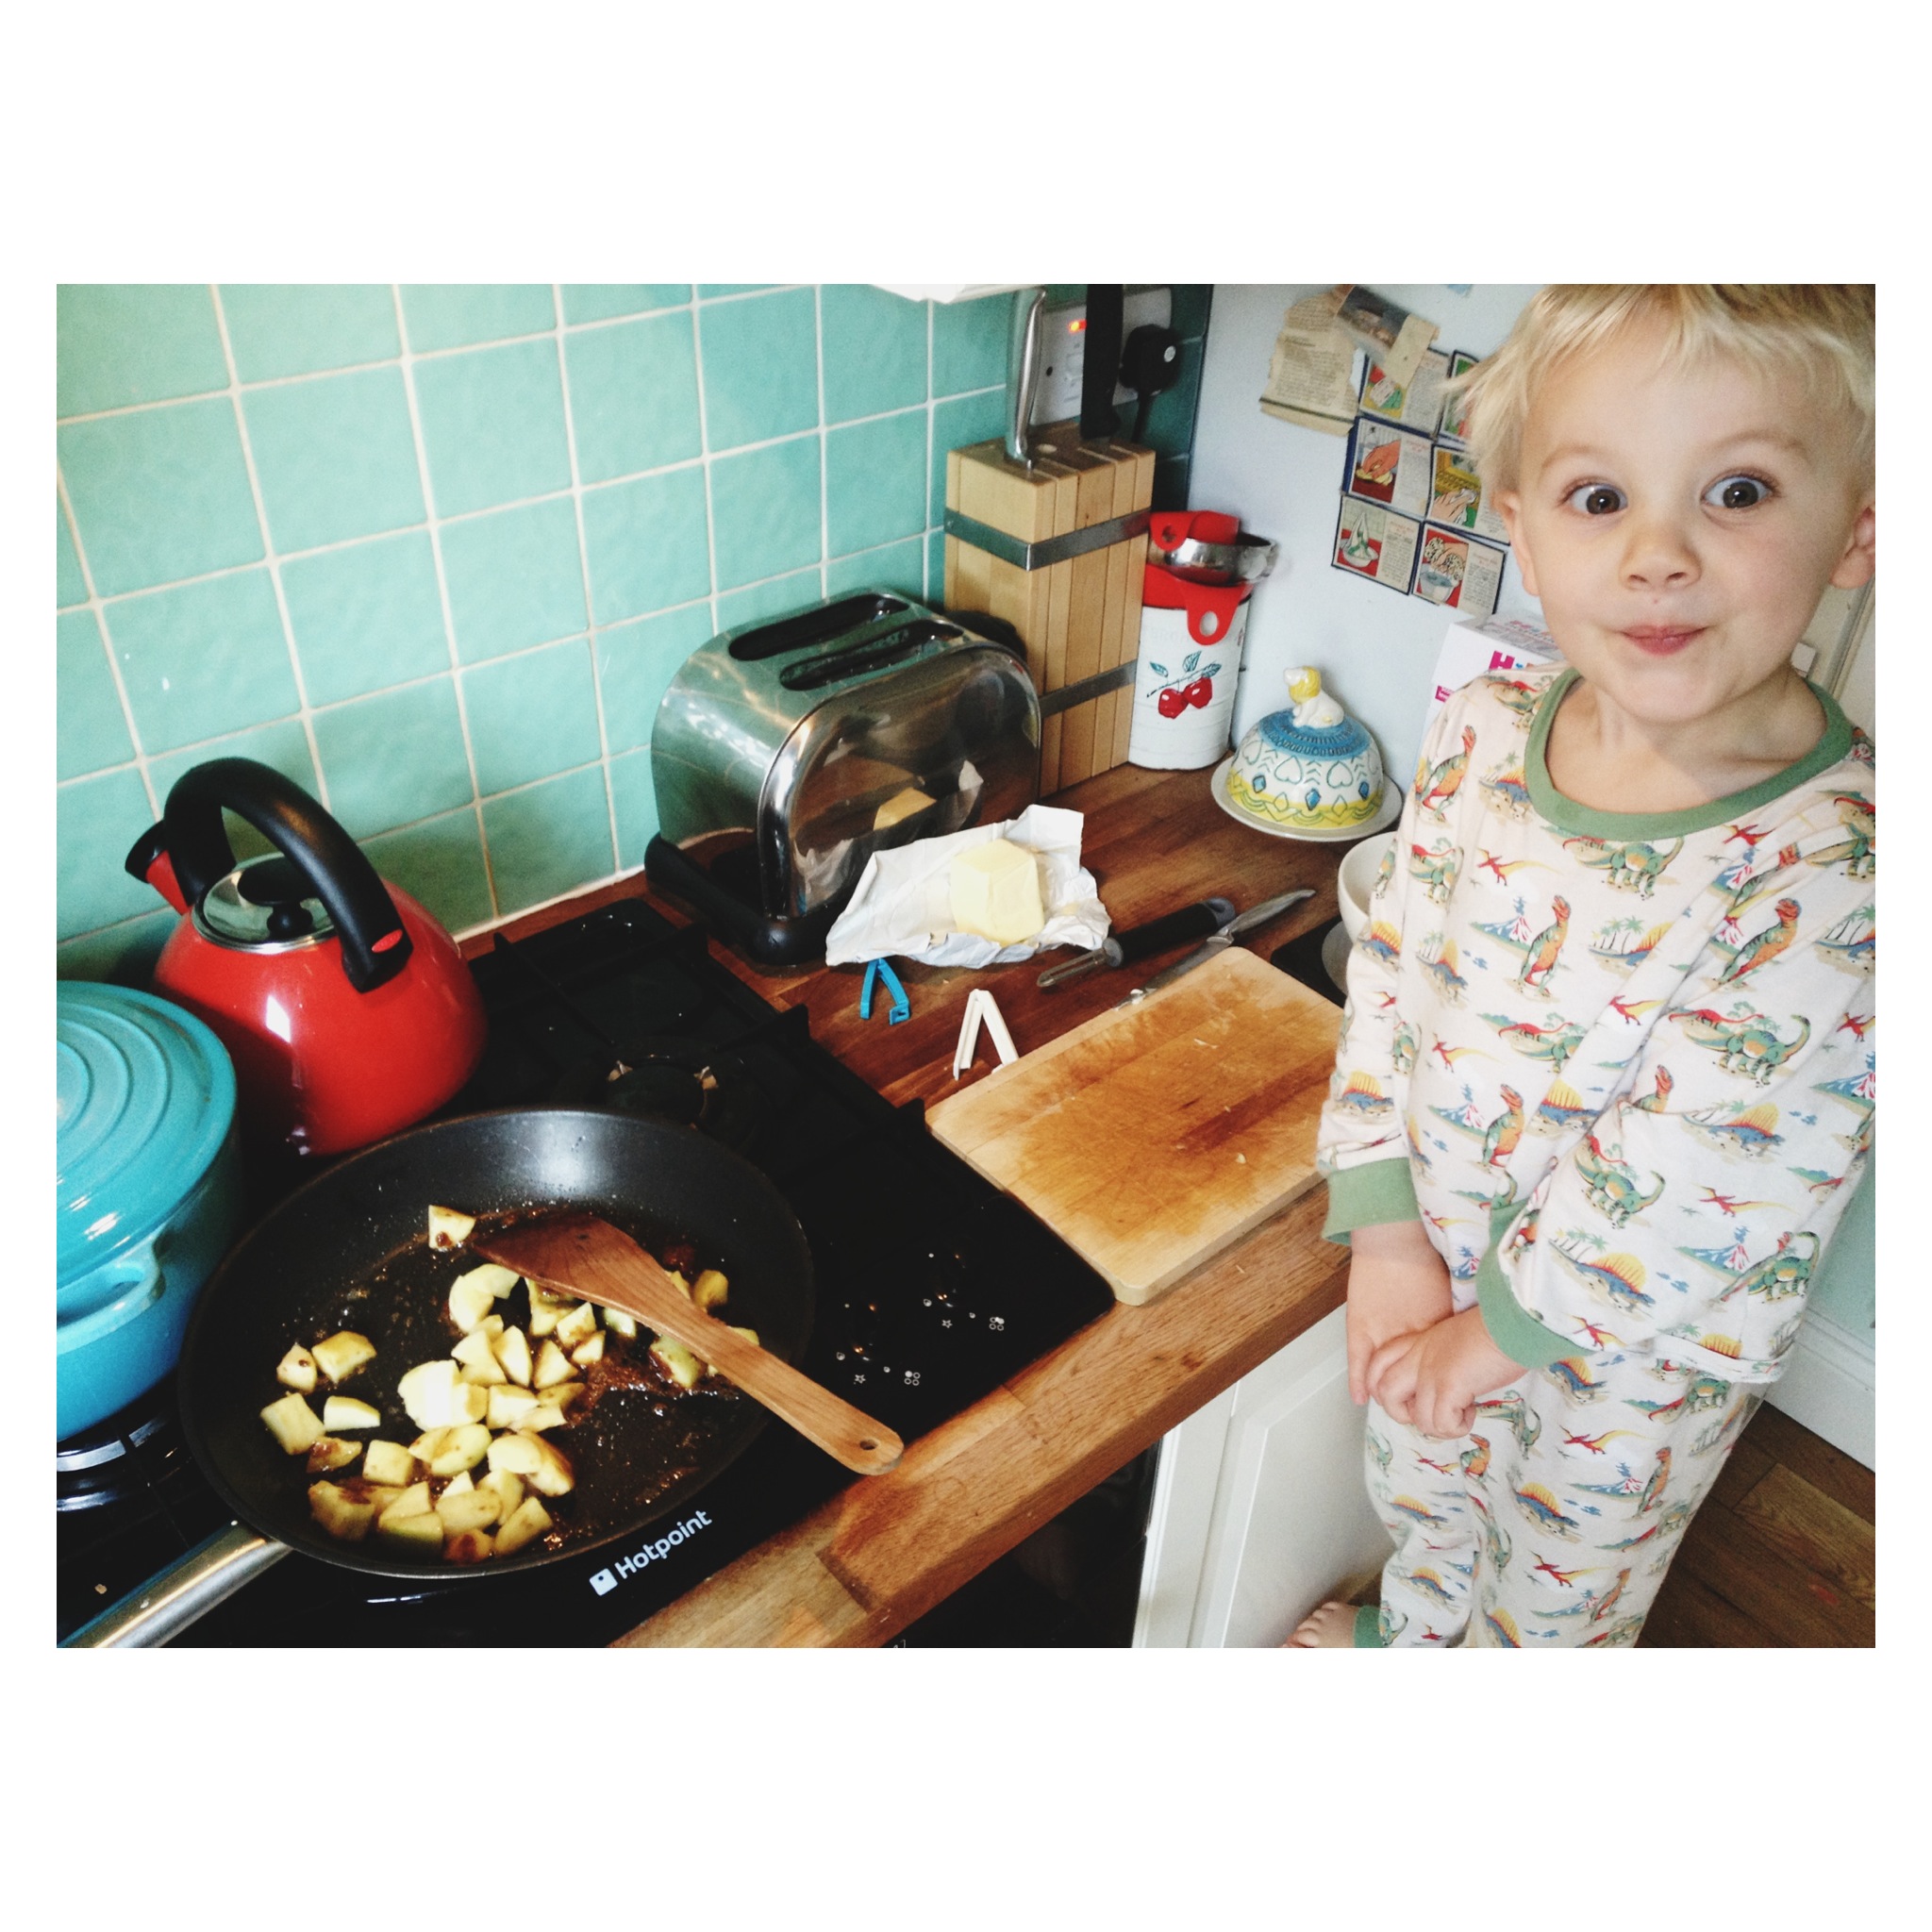
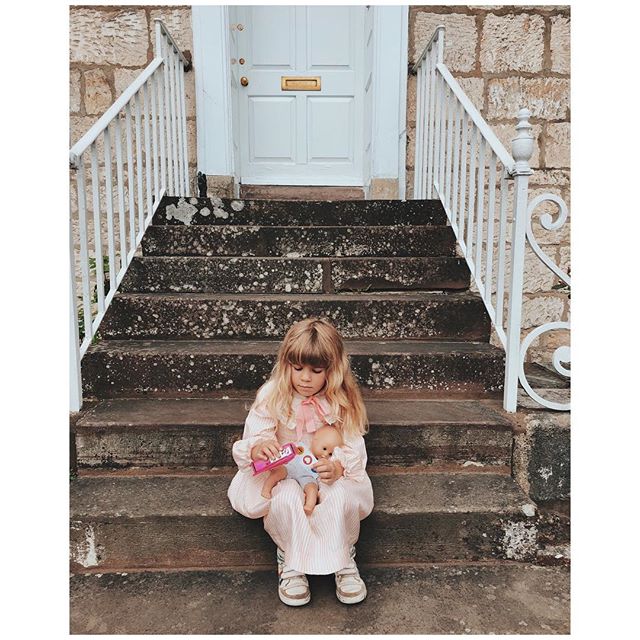
Considering they are filled with parmesan-smothered rice, these are understandably bloody delicious hot, but they are fantastic cold in a lunchbox too. Nice and filling, nutritious and reliably devoured. Even Indiana polished them off, and she likes to attempt survival on milk and bananas alone. And apart from the bit in direct contact with sizzling hot oil, they are a great one to make with kids, who love smooshing the rice into balls...or any shape they like! 


The nuggets make nuggets

We have settled into the school holidays now, but for a while there I was going a tiny bit bananas trying to come up with *things to do*. Possibly because there was a rainy week or so, which is always a killer, but beyond plodding from park to picnic to garden London isn't heaving with FUN! for me + two smallies and a wallet on the thinner side. So to the kitchen... we made gnocchi! It was extremely messy but simple, fun, and great for kids to get involved in. Even Indiana got stuck in. Literally.

IMG_2368.jpg

Sweet Potato Spelt Gnocchi

600g sweet potatoes
200g white spelt flour + more for dusting
1 egg
 

Chop the potatoes in half and then boil in their skins for 20 mins. Drain and leave to cool, then peel the skins off and mash. This was Pablo's mashing outfit...  

he insisted on slippers, in the middle of summer... but god forbid he wear trousers

he insisted on slippers, in the middle of summer... but god forbid he wear trousers

Mix the mashed potato with the egg and flour. Ours was incredibly sticky, and we just kept adding a little more flour until it became doughy. Make sure your work surface is very floury, split the dough into three and roll out into sausage shapes.  Cut into pieces approximately 3cm long and roll them in your hand to make a little gnocchi nugget. Pablo was in charge of all this so ours were....varied in shape and size a bit. He especially enjoyed squishing them with a fork, which is supposed to make them look even more gnocchi-esque, but in our case made them look completely bonkers.

Drop the gnocchi into boiling, salted water in batches and boil until they float to the surface - a few minutes. Drain and then dust flour (we went for a flour/semolina mix for that bit). We then pan fried the gnocchi in a little oil until it was golden, and served it with some pan fried cabbage, cream, lemon and a bit of white wine. It was scrumdiddliumptious. Worth having to clean up gnocchi-dough monster hands for an afternoon....

buns!

Mmm SUMMER. It has actually finished now, apparently, but there is still the odd hero sending bbq smoke out into the late afternoon air to help you remember a time when the weather was reliably not going to flash-hailstorm (in July) and lying in the grass drinking beer seemed like a reasonable plan for an evening out. Anyway, just in case it decides to pay us another visit between now and next June, here's a rad recipe for burger buns. Or hot dog buns. Or whatever kind of bun you need. It is mindbendingly easy, and so delicious that you will never (seriously, never) buy buns again. Ever. The recipe below is a cheat's version of this recipe from Smitten Kitchen, so if you're not in a mad hurry all the time like me, or don't have a Kitchenaid/stand mixer, it's worth checking the original recipe out.

IMG_2358.jpg

Brioche burger buns

3 tbsp warm milk
2 tsp dry active yeast
2.5 tbsp sugar (have made this with both caster and soft brown, both awesome)
2 large eggs
330g strong bread flour (plus more for dusting)
40g plain flour
1.5 tsp salt
36g butter, cool and in cubes (not room temp, but not straight from the fridge)
 

In a large jug, mix 235ml warm water with the warm milk, sugar and yeast. Leave it to stand for 5-10 mins. Beat ONE of the eggs in a cup. (I totally added both eggs the first time I made this, and actually it was fine, but adding just ONE is a much better idea...) In the bowl of a stand mixer fitted with a paddle attachment, mix the flours and salt on low speed. Add tiny cubes or shavings of butter about 10 seconds apart until it is all incorporated and the flour mixture has a texture like breadcrumbs. Switch to a dough hook and add in the yeast/milk mix and the beaten egg. Knead with the dough hook for approximately 8 minutes medium speed, until a dough forms. It is extremely sticky so add a bit more bread flour as you go - as little as you can comfortably get away with, maybe another 100g max - as you would do if you were kneading by hand. Once you have a ball of dough, pop it in a large floured bowl and cover with cling film or a damp tea towel for about an hour (if it's summer - probably closer to two in winter) or until doubled in size. 


Once the dough has risen, tip it out onto a very floured work surface, give it a bit of a punch, and use a big ol' knife (or a dough scraper, if you have one) to chop it into as many pieces as you'd like buns. This recipe makes about 8 very large buns, or 15 small buns, but you can also make long hot dog buns - really, it's up to you, just be aware that obviously the smaller the bun the shorter the cooking time. For burger buns roll and fold the dough into small rounds, then pop onto a baking tray lined with parchment. Cover again with oiled cling film or a damp tea towel for another hour whilst they rise to about double in size. They really do rise a lot - I made hot dog buns that ended up the size of small baguettes. 

Heat the oven to 200C. Beat the remaining egg with one tbsp water and brush your buns with this wash. Pablo did this bit and loved it. You can sprinkle with sesame seeds too at this point (please do, it's ultra delicious). Pop a large tray of shallow water in the bottom of the oven and then put the bun tray in the middle (I did middle and top, and they came out just fine). Bake for approx 10-15 mins depending on bun size (don't open the oven too early or you will cry, but you should be able to see they are done when they are a beautiful golden colour.) Allow to cool on a rack and then devour with home made burgers YUM!

We had a few left over and they kept really well, very moist, for sandwiches the next day, which is another reason they are better than store bought buns. Store in an airtight container.

pink fluffy clouds

I was making a LOVE cake for my lovely friend Lisa's Love-themed birthday party and decided I wanted to put some pink marshmallow hearts on top. You can probably buy these somewhere but it turns out that marshmallows are very easy (and sticky) to make, and quite fun to make with kids. We made pink vanilla hearts but you could go for any flavour or colour or shape, they are super simple. Check out the awesome Marshmallowists for some flavour inspiration... 

the love affair with all things sugary continues...

the love affair with all things sugary continues...

Marshmallows

125g icing sugar (or corn flour) for dusting
400g caster sugar
1 tablespoon golden syrup (you can use corn syrup in the US if you wish)
300ml water
2 tablespoons unflavoured, powdered gelatine (we used Dr Oeteker)
2 egg whites
1 teaspoon good vanilla extract

Dust a dish with icing sugar or corn flour. We used two 8in round tins, because we were making thinner marshmallows, but a 9in square tin would be best. Really dust with loads of icing sugar/corn flour - you may want to line it with parchment first as well, as these things are insanely sticky.  

Heat the caster sugar, golden syrup and 175ml of the water in a saucepan. Ideally use a jam/confectioners thermometer to check the temperature - you want the syrup at 120-130 degrees C. If you don't have a thermometer you can test whether it's ready by whether a small drop of syrup forms a hard ball when dropped into cold water. 

The heating takes 5-10 minutes, so in the meantime prep the gelatine. Place the remaining 125ml water into a heatproof bowl and sprinkle with the gelatine. Heat the bowl over simmering water until the gelatine has completely dissolved. When the syrup is ready, remove from the heat and whisk in the gelatine mixture. Set aside.  

This next bit is super sticky, so try and have some peace to get on with it. I got interrupted by Indy somehow climbing the kitchen stepladder and half falling off again, and little globules of marshmallow flew across my kitchen like ghosts. Fun to clean up...  Whisk the egg whites into soft peaks in a large bowl, then pour in the syrup mixture in a steady, slow stream whilst continuing to whisk, until the whites become stiff. Stir in vanilla (or any other flavours or colours of your choosing). Spread into your prepared tin and refrigerate for about 8 hours. 

Have a bowl of cornflour ready for dusting your hands and the marshmallows as you remove them from the tin. Use cookie cutters or a knife to cut them. We then dipped some of ours in melted dark chocolate and sprinkles for extra yum, and a few got brushed with glitter and made it onto the LOVE cake. My husband is still working his way through the tin of offcuts. They are really delicious and if it wasn't finally summer I wouldn't hesitate to drown some in hot chocolate.  


The finished LOVE cake and the exhausted sleeping suntanned Pablo...

an apple a day

Pablo's much loved childminder, Lucinda, moved away a year ago and we were very excited when she asked if she could pop down for a visit. Obviously we had to make a cake, but with a miserably poorly baby a trip to the shops was not going to happen. I scoured the cupboards and we had just the right amount of this and that to make this delicious apple cake. It was extremely easy and Pablo helped me lots. Indy did the opposite by tugging on my leg and looking pathetic throughout, but we got there in the end... ​

IMG_6322.JPG

Caramelised Cinnamon Apple Cake

100g butter + 1 tbsp
175g brown muscovado sugar + 1 tbsp
2-3 dessert apples
2 eggs
1 tsp vanilla extract
200g plain flour
1 tsp baking powder
0.5 tsp ground cinnamon
100ml milk
TOPPING:
25g flour
85g demerara sugar + 1 tbsp
0.5 tsp ground cinnamon
50g butter
3 tbsp toasted sliced almonds

recipe adapted from BBC Good Food 

​Heat oven to 160C. Mix the topping first - flour, demerara sugar, cinnamon butter with your fingertips to make sticky breadcrumbs. Pablo did half of this, but once he began threatening to eat hunks of sugary butter from his fingertips I chucked it all in a food processor. Stir in 2 tbsp of the almonds and set aside. 

Cut the apples into 1.5cm-ish squares. Melt the 1 tbsp butter and 1 tbsp sugar in a non stick frying pan and then add the apples and cook for about 5 minutes until everything is brown and gooey and yummy smelling. ​

Make the cake by creaming the butter and sugar until light and fluffy. ​Add the eggs one at a time and mix well, then add the vanilla. Combine the dry ingredients and alternate adding them and the milk until all is well combined. Grease a springform 8in/20cm tin and line with a circle of parchment on the bottom. Spoon in your cake mix and then sprinkle with the topping. Mix your remaining 1 tbsp demerara and almonds together and sprinkle these on top. Bake for 45ish minutes. Cool ten minutes in the tin before removing, then cool on a wire rack until it's time to indulge. ​

Actual best cookies ever

In my hand-scrawled recipe book (started circa 2001) I have this recipe down as "Best Choc Chip Cookies (Actual Best!)" and as far as I've experimented over the decades they really are. I have absolutely no idea where they came from, but what a find! On Sunday Konch's oldest pal Mark popped over to see his little god-daughter and I realised at the very last minute that we barely had a withered carrot in the house to offer him. These took about 15 minutes to whip up and were gone again almost as quickly. One batch makes a LOT o' cookies but the dough refrigerates like a dream and freezes great too.  They are crunchy *and* chewy and everything they should be. I've made it so many times, often with way less chocolate than the recipe calls for and they still turn out scrummy, so they are great for just making at the last minute with whatever chocolate...nuts...etc... you've got. On Sunday I used choc chips, raisins and chopped pistachios in place of just chocolate and it was a magical combo...

eeeeeeat meeeeeee

eeeeeeat meeeeeee

225g butter, room temp (soft)
200g caster sugar
220g packed brown sugar
2 eggs
10ml vanilla extract
375g flour
5g bicarb of soda + 10ml hot water
3g salt
335g chocolate chips (I find chopped up good quality dark choc works better)

Heat the oven to 175C. Cream the butter and sugars until light and fluffy. Beat in the eggs one at a time and then add the vanilla. Dissolve the bicarb in hot water and add along with the salt. Stir in the flour and chocolate/nuts/raisins/whatever you fancy. Bake for 8-10 mins, then leave to cool a bit before trying not to eat all in one sitting.

strawberry milkshake cake

My lovely friend Jennie is always so patient and generous with her time when it comes to helping me out with little sewing projects (and teaching me how to make amazing quilts! Well, her quilts are amazing. And so are her classes - bookable here) that when she offered to spend her actual birthday helping me to prep a quilt for Pablo I thought it would only be right to make her a big old cake...

IMG_5342.JPG

Jennie is one of the more colourful folk I know (literally - she was dyeing her hair turquoise as we sewed) and made a special request for no chocolate, so I was excited to have an excuse to hunt out a suitably colourful cake. As usual, Sweetapolita did not disappoint and I went with an adaptation of her Strawberry Layer Cake with Whipped Strawberry Frosting

350g Granulated Sugar
85g Strawberry flavoured gelatin crystals (don't be a moron like me and get block jelly. I had to send husband on a last minute urgent errand to buy crystals and all he could find were raspberry vegetarian jelly crystals, which worked perfectly, just fyi...)
227g unsalted butter, softened
4 large eggs
300g cake flour (this is not widely available in the UK - see tips on how to make your own here)
1 tbsp baking powder
3/4 tsp salt
240ml whole milk
1 tbsp pure vanilla extract
60ml strawberry puree (blend a handful of slightly defrosted frozen strawberries)

Preheat oven to 170C. Line 3x6in round cake tins with parchment and flour, tapping out any excess. Ensure strawberry puree is not icy, then combine with milk and vanilla. In a mixer, cream the butter with the sugar and jelly crystals until light and fluffy. I usually cream the butter a minute or two on its own first to make sure it's soft enough, or this can take ages... Sift the remaining dry ingredients together. 

Add eggs to the creamed butter and sugar one at a time and mix well after each addition. Use a spatula to scrape down the sides of the bowl so that everything is combined. Next alternate adding your dry ingredients and strawberry milk mixture, starting and ending with the dry. Mix well between additions but be careful to only mix until combined, not over mix. At this stage I also added a couple of drops of Americolor Neon Pink gel colour to give the cake an extra pink kick. 

Divide the mix between three pans. I thoroughly recommend weighing the batter so that this is as exact as possible. Bake in preheated oven approximately 30 minutes - my oven is pretty hot, but I recommend carefully (and speedily) checking the cakes with a skewer after 25 mins and keeping an eye on them every 5 mins beyond that. 

When the cakes are done, leave them in the tins 10 mins before transferring to racks to cool completely. Then make the icing!

250g unsalted butter, softened and in cubes
330g icing sugar
10ml milk
1 tsp pure vanilla extract
30ml strawberry puree (as above - it can be cold but make sure it isn't icy)

Whip the butter for 8 minutes at medium speed with an electric mixer. Add sifted icing sugar slowly with the milk and vanilla and mix on slow 1 min and then on high for 6 more. Then add the strawberry puree, and a drop of pink gel colour (optional - and you can of course add more than a drop! Just be aware that the colour does add a slightly yucky taste, and that it MUST be gel colour or you will be adding too much liquid). 

Stack the cakes and ice generously between layers before doing a very thin crumb coat to cover the whole cake. Pop the cake in the fridge for 30 mins before removing and applying a thick final coat of icing. 

The cake was DELICIOUS, really moist and tasted just like those naughty strawberry milkshakes I'd get at the seaside as a kid. It also looked pretty spectacular in all its pinkness. Definitely one to make again. Two large slices was probably a bit much but I needed to keep my strength up for cutting all those quilt squares...

kiss me cake

Just had a major weekend of parties, I think I may now have more prosecco running through my veins than anything else. Despite the hours of sleep I can never recover, and the sense of impending doom that accompanies most of my 30-something hangovers, it's always worth it for the chance of a long, rambling catch up with beloved old friends. Had to make little cakes for them too of course, and as I've been dying to make some meringues I thought I'd make this my excuse. 

Both cakes were 6" versions of this recipe (1 x that recipe made both these 6" 3-layer cakes), though I made Chris's yellow cake funfetti inside and Liz's pink one was three layers of different pink. The meringues were strawberry and black pepper from this recipe by the amazing Meringue Girls:

Strawberry & Black Pepper Meringue Kisses

150g egg whites
300g caster sugar
1/4 teaspoon cream of tartar
50g frozen strawberries
1/4 teaspoon coarse ground black pepper

This recipe makes about 50 (I still have a whole tub of them and have eaten LOADS, but also hoping they'll double for toadstools around the gingerbread house I may never get round to making...) so you can definitely attempt less. Also I played around with different sizes, which is fine if you are keeping an eye on them whilst cooking.

Make the strawberry coulis by heating the strawberries with a pinch of sugar until they break down, then whizz them into a paste and cool.

Heat oven to 200C. Line a deep baking tray with greaseproof paper and heat the 300g caster sugar until the edges start to melt. This is apparently to help the sugar to dissolve into the egg whites. I am pretty sure I overheated my sugar because the edges were melted solid and I had to chuck them away. Still, it was only about 50g sugar and I just replaced it straight from the packet and all was FINE! Turn the oven down to 100C.

Wipe your mixing bowl & whisk attachment dry with lemon juice & paper towel to remove any possible grease, then add egg whites. Whisk slowly at first, allowing bubbles to form, then turn up the speed and whisk until you have medium peaks of fluffy meringue. At this point start adding the sugar spoon by spoon and continue whisking until you have a stiff, glossy meringue - about 5 minutes. Stir through the coulis and add black pepper to taste. I hardly added any black pepper and the taste was pretty strong, just as a heads up... 

ready to pipe!

ready to pipe!

Turn a disposable icing bag inside out and paint some lines in red, pink - or, in my case, electric pink - up the side. Turn back the right way out (awkward!) and fill with yummy meringue. Cut a hole approx 1/2in in diameter and pipe meringue kisses onto a lined baking sheet. Mine came out great, but in hindsight I could have put a bit more into my stripes as some were very feint, so don't be shy with the gel colours. 

Bake 30-40 minutes at 100C. To ensure they stay a bit mallowy in the middle, be sure to take them out as soon as they lift cleanly from the baking sheet. 

I thought these were so easy to make, lots of fun and make fantastic cake toppers. Definitely going to experiment with more colours and flavours... in the imaginary universe where I have infinite spare time. 

(yes, they do look like nipples)

thanks oh thanks oh thanks

Yes, I'm English and live in London... but I'm also in love with food, and I grew up in the States. Therefore I love Thanksgiving! It is a big, wonderful excuse to gather together with friends, force yourself to feel grateful for things, and eat stuff that is not at all savoury enough to be served as a main course.  My brother Xander or I often host a big get together, but this year I was asked to do a Thanksgiving pop up at the local pub by friends who run the E17 Pop Up Project. Kind of scary but a chance to learn some new cooking skills and get a bit of catering experience. I roped Xander in to help, and his wife Zara for decorating back-up, and we set about prepping Thanksgiving for FORTY TWO!

Thanks-Pop-Up-2012.jpg

I have never been particularly keen on cooking turkey. They are MASSIVE! They take up entire ovens and never seem to cook properly and often end up dry and are regularly a huge disappointment. I had to find a way not to disappoint my 42 paying customers, though, and after extensive turkey research I found the most amazing recipe. I will never cook turkey another way again. It came out absolutely perfect, moist and scrumptious - and I don't even like turkey, as a general rule. Just in time for Christmas I've copied it out below. Seriously it's nuts how good - and easy - this is...

Malt-Beer-Brined Turkey with Malt Glaze

original recipe from bonappetit.com

Glaze
160ml barley malt syrup (can substitute black treacle or molasses)
60ml malt vinegar
6 fresh sage sprigs
4 fresh thyme sprigs
1/2 teaspoon ground black pepper
2 tbsp unsalted butter

Brine
4.5 litres water
400g coarse sea salt
3 x 340ml bottles/cans of stout 
1.5 cups barley malt syrup (can substitute black treacle or molasses)
thyme

This recipe will give you enough for a 14-16lb turkey/8-10 servings. Multiplying it for more was simple. Also we prepared two giant turkey crowns, not a whole turkey, but I can't see it making much difference.

Brining the turkey helps to infuse juiciness - there is a full on technical explanation of the whys here - and is crucial to the success of this recipe. I am never not brining a turkey again! You need to  brine the turkey for about 16-18 hours so start the day before. Pour the water into a non-reactive pot. Add the salt and stir to dissolve, then add the beer and malt syrup. The original recipe calls for you to then place two oven bags (one inside the other) into a large bowl, rinse the turkey inside and out, place in the bags (in the bowl) breast side down and pour in the brine. We had so much turkey I just brined it in one immense pot. Either way, chill the turkey in the brine for the aforementioned 16-18 hours. I chucked in some thyme sprigs for kicks, as I rather over-bought it. After brining dry the turkey and, if possible, return to the fridge to further air dry for an hour or so. 

Brining the night away

Brining the night away

You can make the glaze in advance too. Bring the malt syrup, vinegar, herbs and pepper to boil in a small saucepan. Stir occasionally. Reduce heat and simmer until the glaze coats the back of a spoon (5ish minutes). Mix in the butter. 

Cook your turkey at 170C for 20 mins/454g plus 20 additional mins. Add a couple of cups of water to the pan and keep topping it up if it dries out. For gravy purposes it is a good idea to add some celery, onion and garlic to roast with the turkey, but actually I didn't get round to it and the gravy was awesome regardless. Leave the turkey to cook for a couple of hours before opening the oven and brushing with the glaze. After that continue to brush with glaze every 20 mins until cooked. Remove the bird an hour before serving (ideally) and cover with foil to rest the meat. For gravy I poured the sauces from the roasting tin into a jug, separated the fat and returned it to the tin on the hob, added a handful of flour and made a roux, then slowly added the reserved juices plus about a bottle of red wine. it was DELICIOUS and took about five minutes... 

A big shout out to Smitten Kitchen whose faultless recipes I relied upon for sweet potato biscuits (which were un-be-lievable), the best homemade pumpkin pie I've ever tasted, and the best excuse to finally attempt homemade marshmallows - s'more pie. IT WAS EPIC. And it turns out marshmallows are not that difficult to make! An extra shout out to my brother, who lugged big tins of pumpkin and bottles of corn syrup over from a trip to New York so we could be as sickly sweet as we could. 

Now I never want to see another orange food again. Until next November, maybe...

With Jam in

Have been desperate desperate desperate to make some doughnuts for a long time now. I want to make lots, really, in all kinds of flavours and glazed with all kinds of colours and chocolates and sprinkles and... I have proper little daydreams about it. Have recently started following Sidecar Doughnuts on Instagram which is killing me a little bit, too. Talk about living the (doughnut) dream!

I had to nick this from their Pinterest to show you how beautiful their doughnuts look... I hope they don't mind!

I had to nick this from their Pinterest to show you how beautiful their doughnuts look... I hope they don't mind!

So I was dying for an excuse to make some doughnuts of my very own, and finally got one (isn) when we were invited to a Halloween bash by Pablo's best bud Edie. I have about 10 recipes I'm eager to test, and I started with Richard Bertinet's little beignet style ones (except I totally cheated and used the Kitchenaid - sorry Richard! I still need to buy a dough scraper, in my defence...)

IMG_1331.JPG

Doughnuts 

250ml full fat milk
15g fresh yeast (I actually used 14g dried yeast as had no fresh, and it was fine
500g strong bread flour
60g unsalted butter at room temperature
40g caster sugar
10g salt
2 large eggs
500ml groundnut oil for frying
caster sugar for dusting
filling (jam, creme patissiere etc) - optional

Heat the milk until it is "body temperature" - neither warm nor cold - in a saucepan. Mix the yeast into the flour by hand (if it is fresh yeast, rub it in as you would making a crumble), then rub in the butter (I had cut mine into little cubey shardy bits). Add the sugar and salt, then the eggs and the milk. 

If you are working the dough by hand, you need to follow Richard's method - which involves lots of stretching and lifting the dough until it comes together. Do not add more flour even though it seems super sticky! If using a mixer with a dough hook (like me) pop it on a medium speed for approx 6 or 7 minutes, until the dough comes together in a smooth, elastic lump. Shape the dough into a ball.

Rest the dough for 1 hour in a lightly floured bowl with a damp tea towel or some cling film over the top. Preferably pop it somewhere warm, but I know we don't all have agas and airing cupboards (I have neither) - don't panic, it will still rise. It may take a bit longer than an hour somewhere not-so-warm, so keep an eye on it - you want it to double in size. 

Tip the dough out onto a lightly floured surface.

Divide the dough into three. With each piece, flatten with the heel of your hand into a rough oval shape. Fold one side into the middle and use the heel of your palm again to press it down and seal. Repeat with the other side, then fold the whole thing lengthways into a long sausage shape, sealing the long edge. Cut this shape into 30g pieces (I weighed them! They don't have to be bang on 30g, of course, just thereabouts). Work each piece into a ball by folding the edges into the centre and pressing down well, rotating the ball of dough in your hand as your go. Do this a few times, then roll the ball in your hand to to smooth the sealed edge. Pop them on a lightly oiled, lightly floured baking tray under a damp tea towel and leave to prove for 45ish mins. They balls should about double in size. 

Heat your oil to deep-fry stage in a 20cm saucepan (about 180C - if you have a thermometer use it! Richard said it would take about 15 mins to get this hot on a medium heat, but after 10 minutes mine was smokingly, screamingly way too hot and I had to turn it off to give it a minute to calm down. Whoops!) Be very careful lowering the dough balls into the oil on a slotted spoon. Obviously the oil is dangerously hot so avoid getting any closer than you have to! Pop about 5 doughnuts in at a time. After 30-45 seconds, turn them over to fry the other side (you can tell by the colour when they are ready). Then remove and leave to cool on some kitchen paper...or a muslin, if you have no kitchen paper but an abundance of baby muslins! 

"EAT ME!" ok...
"EAT ME!" ok...
IMG_1288.JPG

Because they were for a Halloween party I conjured up all kinds of ambitions to fill them with coloured creme patissiere or make some home made jam, but typically ran out of time and had to buy a jar of jam. A tiny bit of foresight and an Amazon Prime membership meant I had this badass instrument ready to help me out with the next step. But in theory a piping bag and nozzle would do the job.  Pablo was an ace little helper and it was actually a really fun project for him - especially the tasting bit. We might have consumed a few in various states of jam-filled-ness...

The verdict in the end was that they were DELICIOUS. And very easy to make. Only trouble is now I can't stop eating them...